The placement, the amount, the formula — all of it, finally explained in a way that actually makes sense.
You picked up a blush, followed the tutorial, smiled at the mirror, dabbed it on your cheeks — and somehow ended up looking like you ran a 5K in the heat instead of a person with a soft, natural flush. Too much. Too low. Too round. And now you’re staring at your reflection trying to decide if you can just blend it into oblivion or if you need to start your whole face over.
Sound familiar? You’re not alone. Blush is genuinely one of the most misunderstood products in a beginner’s kit. It seems so simple — it’s just color on your cheeks, right? But the difference between blush that looks natural and blush that looks overdone often comes down to three things: where you put it, how much you use, and which formula you’re working with.
This guide on how to apply blush covers all of it. Not in a complicated, face-mapping-chart kind of way — in a “here’s what actually works when you’re standing in your bathroom at 7am” kind of way. Let’s get into it.
Key Takeaways
- Less is always more with blush — start with a tiny amount and build up; you cannot easily undo too much blush
- The old “smile and apply to the apples” trick isn’t wrong, but blending upward toward the temples gives a more lifted, modern look
- Powder blush goes after setting powder; cream and liquid blush go before
- Blush should sit above the hollow of your cheeks, never below — low placement drags the face down
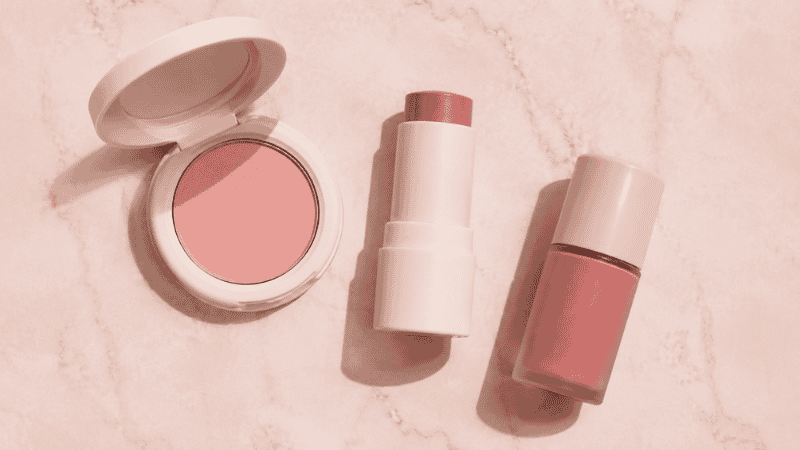
- The three most beginner-friendly drugstore blushes cost under $12 and genuinely perform
Where to Apply Blush on Your Face (The Simple Version)
Let’s start with the most Googled question about blush, because it’s also the one with the most conflicting answers online.
The short answer: start at the apples of your cheeks and blend upward toward your temples. That’s the base rule that works for almost everyone, regardless of face shape.
Here’s how to find the right spot without overthinking it: look straight into the mirror and find the highest, roundest part of your cheek when you smile slightly. That’s your apple. Start there, then sweep the color diagonally upward — imagine you’re drawing a soft line from that point toward the tip of your ear. Stop before you reach your hairline.
What you’re doing is creating a lifted effect. Blush that sweeps up feels modern and brightening. Blush that sits horizontally across your cheeks, or — worse — droops below your cheekbone, actually pulls the face downward and makes you look tired rather than flushed.
Editor’s note: The “smile big and apply to the round part” method you’ve seen everywhere has one problem — when you stop smiling, the blush is sitting in a completely different place than where it looked good. Try applying with a neutral expression instead, and aim slightly higher than you think you need to.
How Much Blush to Apply (This Is Where Most Beginners Go Wrong)
Here’s the truth that most tutorials skip over entirely: the number one blush mistake isn’t placement. It’s amount.
Blush pigment is highly concentrated — especially liquid and cream formulas. A swipe that looks like nothing in the pan can translate into way more color on your skin than you expected. And unlike foundation, you can’t blend blush away once it’s on. You can only add more or wipe everything off and start again.
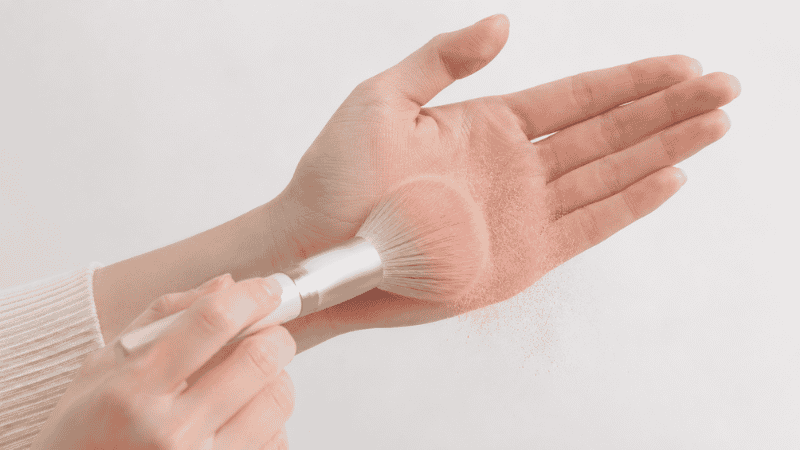
The rule: tap off the excess before every single application. With a powder blush and brush, swirl into the pan, then tap the brush handle against your hand twice. You want very little product on the brush. For cream blush, use your ring finger and take an amount smaller than a grain of rice.
Then apply, look at yourself in natural light (not bathroom lighting — walk to a window), and decide if you want more. Build from nothing. The goal for everyday wear is a flush that looks like you just came in from the cold — noticeable but believable.
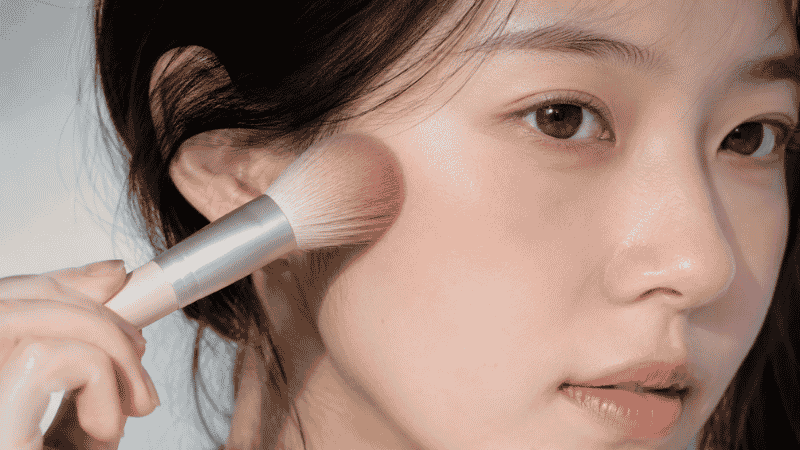
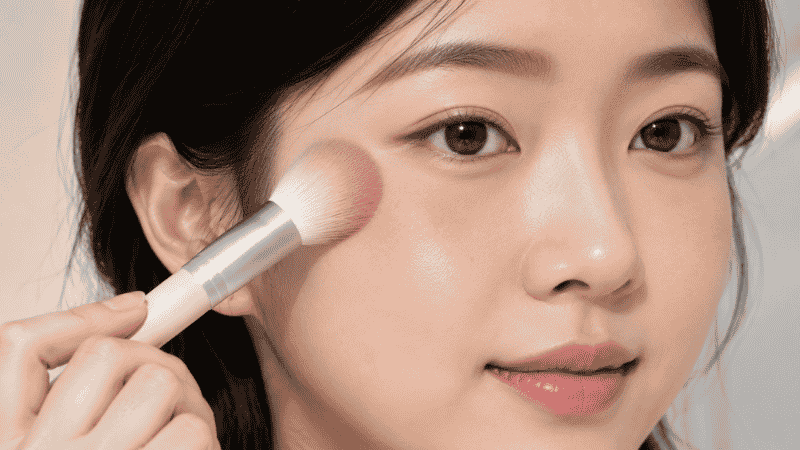
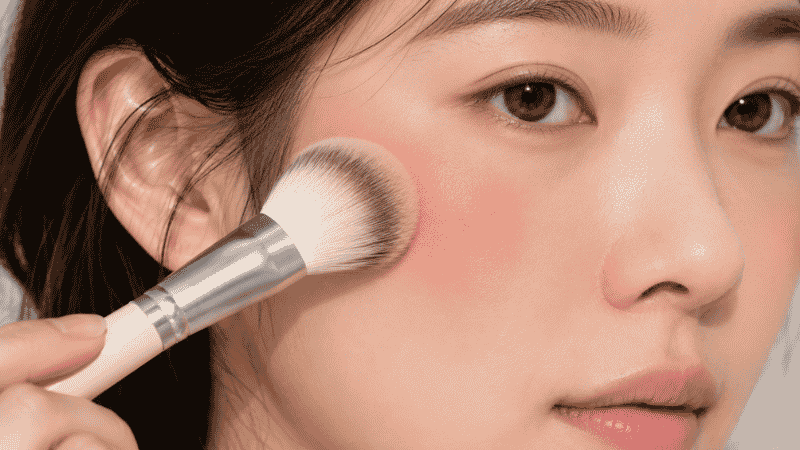
How to Apply Powder Blush
Powder blush is the most forgiving formula for beginners, which is why it’s a great place to start. It blends easily, it’s buildable, and it’s widely available at the drugstore for under $10.
When to apply it: After your setting powder, always. Powder on powder. If you try to apply powder blush directly on liquid foundation, it can look streaky and uneven.
How to do it:
Use a fluffy, dome-shaped blush brush (not the tiny one that often comes in the compact — those are usually too small and too stiff for a natural look). Swirl into the pan lightly, tap off the excess, and apply in a sweeping motion starting at the apple of your cheek and moving upward toward your temple. Use circular motions to soften any edges.
Best beginner-friendly powder blushes:
- Milani Baked Blush (~$10) — buttery texture, beautiful pigment, blends like a dream
- NYX Sweet Cheeks Blush (~$9) — wide shade range, very pigmented so go light-handed
- e.l.f. Monochromatic Multi Stick (~$10) — doubles as a lip and eye color if you want more out of one product
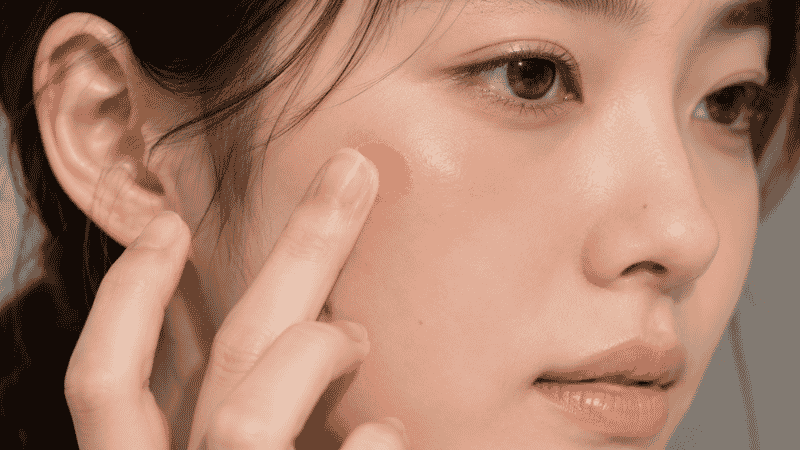
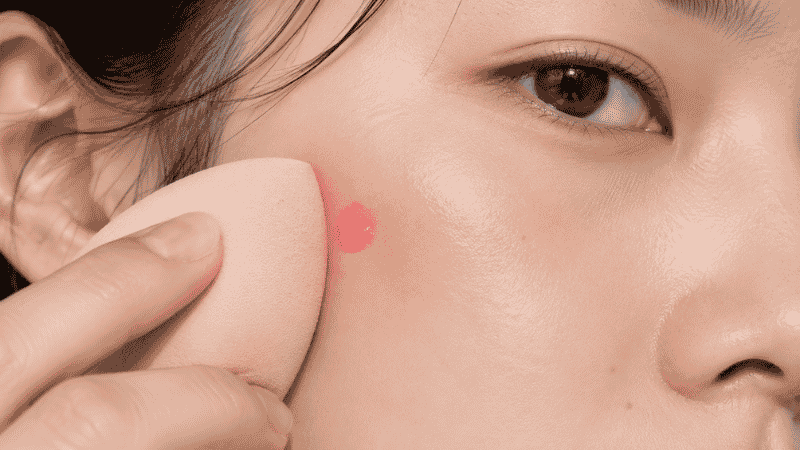
How to Apply Cream Blush

Cream blush has had a major moment, and for good reason — it gives the most natural, skin-like flush of any formula. It looks like color coming from within your skin rather than sitting on top. The catch is that it requires a slightly different technique, and it goes on at a different point in your routine.
When to apply it: After foundation and concealer, but before setting powder. Cream on cream, then seal with powder on top.
How to do it:
Take a tiny amount on your ring finger or a damp beauty sponge. Dab (don’t swipe) it onto the apple of your cheek, then use gentle tapping motions to blend outward and upward. The warmth of your finger helps the product melt into the skin seamlessly.
The most common mistake with cream blush is using too much or blending too aggressively — both result in a patchy, uneven finish. Slow, light taps are everything here.
Worth trying:
- Rare Beauty Soft Pinch Liquid Blush (~$23) — yes, it’s a splurge for a beginner, but one tiny drop goes a shockingly long way and the payoff is unreal
- e.l.f. Putty Blush (~$10) — cream formula, incredibly blendable, great shade range
- Flower Beauty Blush Bomb (~$10) — liquid-cream hybrid, easy to control, very natural finish
How to Apply Liquid Blush
Liquid blush is the most pigmented and the least forgiving. One drop too many and you’re in clown territory — but when applied correctly, it gives the most vibrant, long-lasting flush of all three formulas.
When to apply it: Same as cream blush — before setting powder, on top of foundation.
How to do it:
The absolute key with liquid blush is starting with the tiniest amount imaginable. We’re talking one small drop on your fingertip, or one quick swipe of the wand. Dab it directly onto your cheekbone, then blend immediately with your finger or a sponge. You have to work fast — liquid blush sets quicker than cream, so dragging it after it starts to dry results in streaks.
If you want more color, add a second layer after the first is fully blended. Never try to fix a liquid blush mistake by blending harder — that just spreads the color further.
Editor’s note: If liquid blush terrifies you, start with powder or cream and work your way up. There’s no rule that says you have to use liquid blush just because it’s trending. Use what you can control.
Blush Placement for Different Face Shapes (The Short Version)
Most blush guides turn face shape placement into a 2,000-word chapter. We’re not doing that. Here are the three adjustments that actually matter for everyday wear:
Round face: Apply blush slightly higher than the apple of your cheek — starting at the cheekbone and sweeping upward toward the outer corner of your eye. This creates length and definition without emphasizing the roundness.
Oval face: You have the most flexibility. Apply to the apples and blend upward. You can also try a more horizontal placement across the cheekbone. Both work well.
Square or heart-shaped face: Focus blush on the apples and blend toward the center of the face rather than the temples. This softens angular features and draws attention to the center of your face.
If you’re not sure what face shape you have — don’t stress about it. The universal rule (apples, blend upward) works beautifully on almost every face. Start there.
Blush Placement for Round Face: The Lifted Technique
Since round face blush placement comes up constantly as a question, it deserves its own section.
The goal on a round face is to create the illusion of higher, more defined cheekbones. The way to do that with blush is to avoid the center of the cheek entirely and instead focus on the upper cheekbone area — roughly in line with the outer corner of your eye — and sweep upward and outward.
Think less “round circle on your cheek” and more “diagonal stripe from your cheekbone toward your temple.” The diagonal line naturally elongates the face and creates the structured look that blush low on a round face can’t achieve.
How to Make Blush Last All Day
You apply blush, it looks perfect, and then by 2pm it’s completely gone. If this sounds familiar, here’s what’s happening: your foundation or natural oils are absorbing the blush before it has a chance to set.
Fix it with these two steps:
Step one: Set your base with powder before applying blush. Even a light dusting of translucent setting powder gives blush something to grip onto rather than sliding off an oily or moisturizer-heavy surface.
Step two: Lock everything in at the end with a setting spray. The e.l.f. Mist & Set (~$8) or the NYX Matte Finish Setting Spray (~$10) both extend wear without budging your color.
If you have very oily skin and even these steps don’t help, try layering: apply cream blush first, set with powder, then dust a light layer of powder blush on top in the same spot. The layering technique is the same one professional makeup artists use for events and shoots — it genuinely works.
What If You Applied Too Much Blush?
It happens to everyone. You blink and somehow your face looks sunburned. Here’s how to fix it without starting over:
For powder blush: Take a clean, fluffy brush (no product) and lightly buff the area in circular motions. This disperses the pigment without removing your foundation underneath.
For cream or liquid blush: Dab (don’t rub) a small amount of translucent powder over the blush with a fluffy brush. The powder absorbs and softens the intensity of the color without smearing it everywhere.
Last resort: Take a damp beauty sponge and very gently press (not wipe) over the blush. This lifts some of the product. Then reapply setting powder over the area to blend the edges.
FAQ
Where exactly should blush go on your face?
Start at the apple of your cheek — the round, fleshy part that puffs up when you smile — and blend upward toward your temple in a diagonal sweep. For a more natural look, stop before you reach your hairline and keep the color concentrated on the upper cheekbone area rather than spreading it all the way to the ear.
Does blush go before or after powder?
It depends on the formula. Powder blush goes after setting powder — powder on powder blends more smoothly. Cream blush and liquid blush go before setting powder — apply to your foundation base, blend, then set everything with powder on top.
Does blush go before or after bronzer?
Bronzer always goes before blush. Apply bronzer first to add warmth and dimension to the perimeter of your face, then layer blush on top of the cheeks for color. Adding blush first and then bronzer tends to muddy the colors and make both look dull.
How do I choose the right blush shade?
The easiest shortcut: pinch your cheek and look at the color that appears. That’s your natural flush — and that’s the shade family you want your blush to be in. For fair skin, soft pinks and light corals. For medium skin, peachy pinks and warm corals. For deeper skin tones, rich berries, warm terracottas, and deep roses look stunning.
Why does my blush disappear so fast?
Usually because it’s being applied over a moisturizer or foundation that hasn’t fully set, leaving a slightly slick surface that blush can’t grip. Set your base with translucent powder first, then apply blush, then lock everything with a setting spray at the end of your routine.
Blush Is the Step That Brings Everything Together
It’s the product that makes your skin look alive instead of flat. A little goes a long way — genuinely, the amount you think you need is probably twice as much as you actually need. Start small, blend upward, and build from there.
Once you’ve got blush down, it changes the whole energy of your makeup. It’s one of those products where you do it once correctly and you immediately understand why everyone keeps talking about it.
Keep building your routine with these MyColorKiss guides:
- Makeup Steps in Order: The Only Guide Beginners Actually Need — where blush fits in the full routine
- Makeup Tutorial for Beginners: Your Easy Step-by-Step Guide — start from the very beginning
- Best Drugstore Blush for Beginners — our honest picks under $12, tested and ranked
And remember — every makeup artist you follow once had a day where their blush looked like war paint. It’s part of learning.