How often, what to use, how to dry them properly — and why your foundation brush might be causing your breakouts.
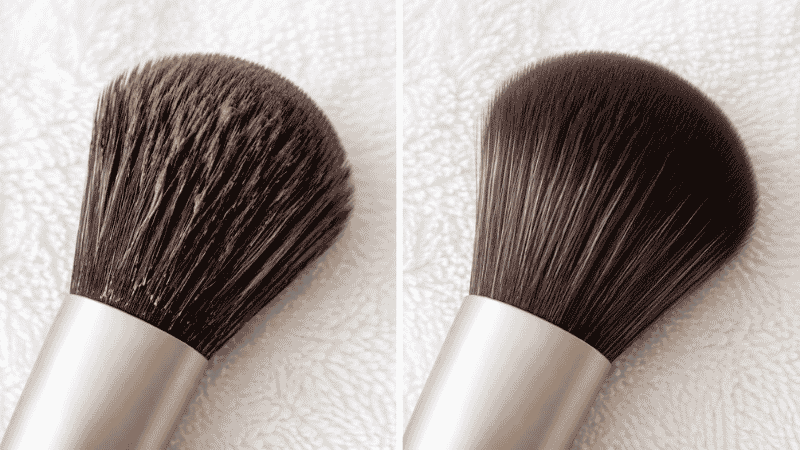
You bought a makeup brush. Used it for a few weeks. And now it’s a stiff, vaguely brownish tool that deposits makeup unevenly, feels scratchy on your skin, and you’re pretty sure has developed its own personality. You know you should clean it. You’re just not entirely sure how, or what with, or whether your method of quickly rubbing it on a towel counts.
It doesn’t. But the good news is that cleaning makeup brushes properly takes about five minutes, costs next to nothing, and makes an immediate, noticeable difference in how your makeup applies.
The less fun news: dirty brushes are one of the most underacknowledged causes of adult breakouts. Makeup residue, oil, dead skin cells, and bacteria accumulate in the bristles after every use. According to the American Academy of Dermatology, this buildup can cause breakouts and skin irritation — and it gets worse every time you use an uncleaned brush on your face.
This guide covers how to clean makeup brushes step by step, what to use, how often, and how to dry them without ruining the bristles. Plus the brush guide that nobody includes: which ones you actually need and what each one does.
Key Takeaways
- Foundation and concealer brushes (liquid formulas) should be cleaned once a week — they harbor the most bacteria
- Powder brushes (blush, bronzer, eyeshadow) can be cleaned every 2-4 weeks
- Baby shampoo is the most recommended budget-friendly cleanser — it’s gentle on bristles and costs about $3
- Never dry brushes upright — water runs into the ferrule (the metal part), dissolves the glue, and the bristles fall out
- A clean brush applies makeup more evenly and with less product than a dirty one
How Often Should You Clean Makeup Brushes?
This is the question most beginners genuinely don’t know the answer to — and the answer depends on what the brush is used for.
Foundation and concealer brushes: once a week. These work with liquid and cream products, which create the perfect warm, moist environment for bacteria to grow. Using a foundation brush daily without washing it is — let’s be honest — pretty gross, and it’s a meaningful contributor to breakouts along your cheeks and chin.
Blush, bronzer, and contour brushes: every 1-2 weeks. Powder products don’t harbor bacteria as readily, but the pigment buildup affects color payoff and blending.
Eyeshadow brushes: every 1-2 weeks. More frequently if you’re switching between very different colors, since residue muddles new shades.
Beauty sponges: after every use if possible, minimum once a week. Sponges have a porous surface that traps liquid product — they breed bacteria faster than any brush.
Editor’s note: If this schedule sounds ambitious, start with just your foundation brush. Clean that one weekly and let the rest follow at whatever pace works for you. Your foundation brush is the one your skin will notice most.
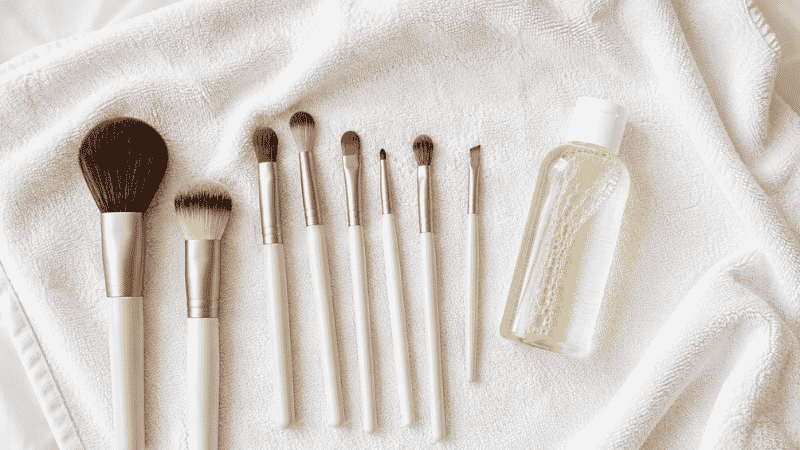
How to Wash Makeup Brushes Step by Step

You don’t need a special brush cleanser. You need baby shampoo, lukewarm water, and five minutes.
What you need:
- Baby shampoo, gentle facial cleanser, or castile soap
- Lukewarm water (not hot — hot water weakens the glue holding bristles)
- A clean towel
- A flat surface to dry on
Step 1: Wet the bristles only. Run lukewarm water over the bristle tips, pointing them downward. Keep water away from the ferrule — the metal band that connects the bristles to the handle. This is where the glue lives, and water dissolves it. If you consistently soak the ferrule, your bristles will start shedding within weeks.
Step 2: Apply a small amount of cleanser. Squeeze a pea-sized drop of baby shampoo into your palm. Swirl the wet brush tip into it in small circular motions. You’ll see the makeup color start releasing immediately.
Step 3: Work the cleanser through the bristles. Massage the bristles gently in the palm of your hand using circular and back-and-forth motions. The goal is to work the cleanser into the base of the bristles, not just the tips — that’s where the buildup is densest.
Step 4: Rinse until the water runs clear. Hold the brush tip-down under running lukewarm water. Keep rinsing and squeezing until the water coming through the bristles is completely clear. If it’s still tinged with color, go back to step 2.
Step 5: Gently squeeze out excess water. Use a clean towel and squeeze (don’t rub or twist) the bristles from base to tip. Reshape the brush head back to its original form.
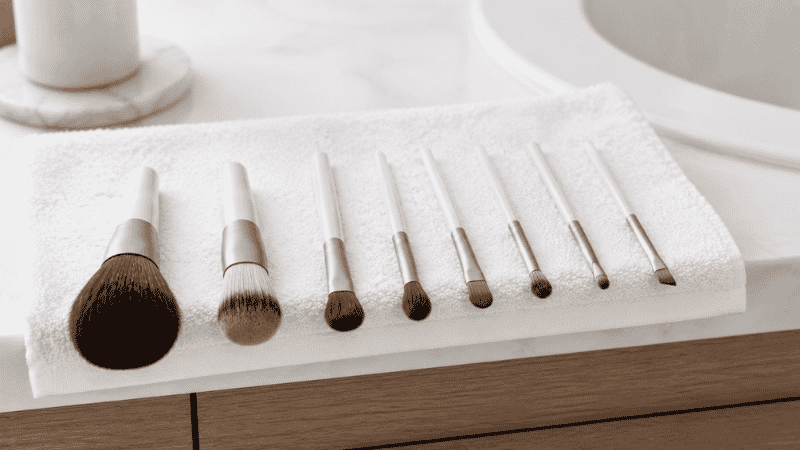
Step 6: Dry flat with bristles hanging off the edge. This is the most important step that most guides mention but don’t emphasize enough. Lay your brush flat on a towel with the bristle end hanging slightly off the edge of a surface. This allows air to circulate around the bristles and prevents water from running into the ferrule. Do not stand brushes upright to dry. Do not use a hair dryer — the heat warps and fuses synthetic bristles.
Drying time is typically 6-8 hours. Most people clean their brushes the night before a makeup day.
How to Clean Makeup Brushes at Home Without a Brush Cleanser
Baby shampoo is the most recommended option — it’s gentle on both synthetic and natural bristles, it’s inexpensive, and it’s in most people’s homes already. But there are other options that work well.
Baby shampoo (~$3-5): The gold standard for DIY brush cleaning. Johnson’s Baby Shampoo is the most commonly used. Gentle enough for natural hair bristles, effective at cutting through liquid makeup residue.
Gentle facial cleanser: Your regular face wash works perfectly. Anything you’d put on your face is safe on brush bristles. The Ordinary Squalane Cleanser is a popular option among the beauty community for this purpose.
Castile soap (like Dr. Bronner’s ~$10 for a large bottle): Concentrated, effective, very gentle. A few drops in water goes a long way and lasts months.
Dish soap in a pinch: Effective at cutting through oil-based products, but can dry out natural bristle brushes with repeated use. Fine occasionally, not ideal as your regular cleanser.
What to avoid: Alcohol-based cleansers for deep washing (fine for quick sanitizing between uses, but dries and damages bristles over time), hot water (loosens glue), and anything with harsh sulfates.
Foundation Brush vs Sponge: Which Is Better for Beginners?
This is one of the most searched makeup tool questions — and the answer genuinely depends on the finish you want.
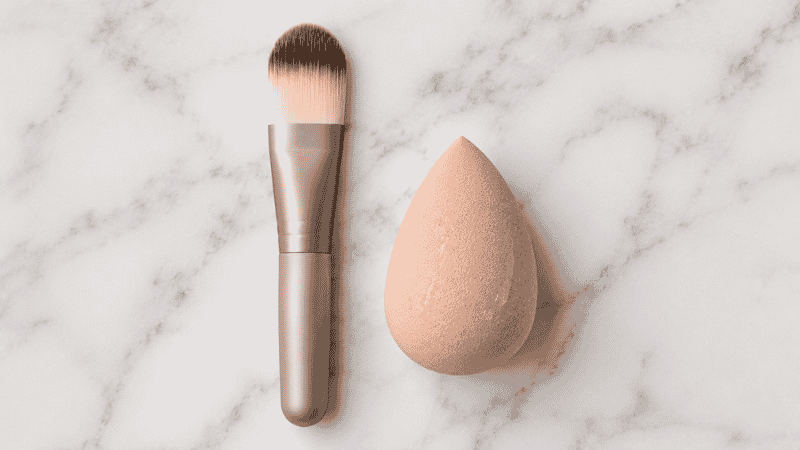
Foundation Brush
A flat or stippling brush applies foundation with more coverage and a more polished finish. The technique matters: buff in small circular motions starting from the center of your face and working outward.
Pros: More coverage, more precise, lasts longer between washes than a sponge (bristles dry faster) Cons: Can leave brush streaks if technique isn’t quite right, less forgiving for beginners
Damp Beauty Sponge
A damp sponge (wet it under the tap, squeeze out excess water) gives the most natural, skin-like finish. The bouncing motion shears out product and blurs edges in a way brushes often can’t replicate.
Pros: Most forgiving for beginners, most natural finish, great for setting powder too Cons: Absorbs more product, needs washing after every use, needs replacing every 3 months
For most beginners: start with a damp sponge. It’s more forgiving of technique errors and gives a more natural result. Move to a brush when you want more coverage or a more “done” finish.
Affordable picks:
- Real Techniques Miracle Complexion Sponge (~$8) — best drugstore alternative to the Beautyblender, nearly identical performance
- e.l.f. Total Face Sponge (~$6) — ultra affordable, surprisingly effective
What Makeup Brushes Do I Actually Need?
Most beginners buy a 24-piece brush set, use three of them, and wonder why the rest exist. Here’s the honest list of what you actually need to start:
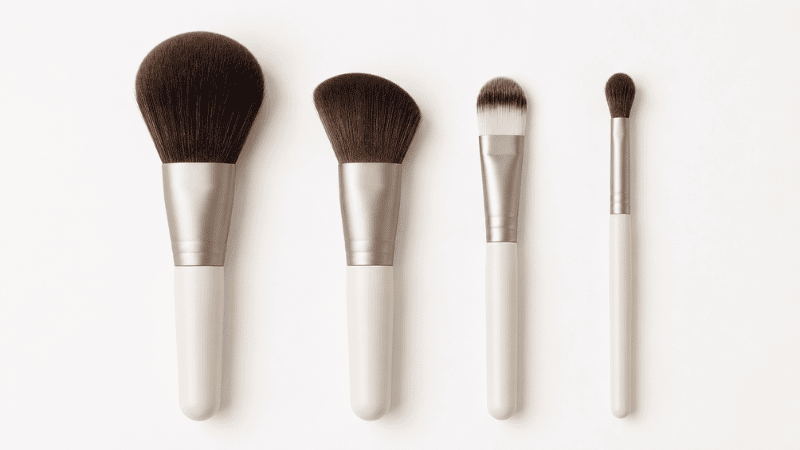
The 4 Brushes Worth Buying
1. Fluffy powder brush Large, dome-shaped, super soft. Used for setting powder, blush, bronzer, and highlighter. The most versatile brush in your kit. If you only buy one brush, this is it.
2. Small flat foundation brush (optional — or use a sponge) For applying liquid or cream foundation. Not strictly necessary if you’re using a beauty sponge, but useful for more precise coverage.
3. Angled blush/contour brush The angled shape makes blush placement more precise — sweep from the apple of the cheek upward toward the temple. Also useful for bronzer and light contouring.
4. Small eyeshadow blending brush A fluffy, dome-shaped brush in a smaller size for blending eyeshadow. Makes the difference between eyeshadow that looks harsh and eyeshadow that looks blended.
Everything else — fan brushes, stippling brushes, contour brushes, kabuki brushes — is useful eventually but unnecessary when you’re starting out.
What Is a Kabuki Brush?
A kabuki brush is a short-handled, dense, dome-shaped brush originally used for theatrical powder application. In everyday makeup, it’s primarily used for applying loose or pressed powder, setting spray in powder form, or building coverage with powder foundation.
The dense, tightly packed bristles deposit product quickly and evenly, making it ideal for full-face powder application. It’s less useful for precise work like blush placement — for that, an angled brush gives more control.
Worth buying? Eventually, yes — especially if you use setting powder regularly. As a starter brush, the fluffy powder brush covers the same purpose.
What Is a Stippling Brush?
A stippling brush has two layers of bristles: a shorter, denser base layer and longer, more sparse outer bristles. This unusual design deposits product in a way that mimics the look of airbrush coverage — light, diffused, and very natural.
It’s particularly good for lightweight foundations, skin tints, and blushes when you want a sheer, buildable application. The stippling motion (pressing and lifting rather than sweeping) creates a finish that’s almost impossible to achieve with a regular brush or sponge.
For beginners: Nice to have, not essential. A damp sponge achieves a similar natural finish and is easier to use correctly.
What Brush to Use for Concealer
For concealer, a small flat brush gives the most precise coverage — especially useful for blemishes, where you want product exactly on the spot without spreading it around.
For under-eye concealer, your ring finger is often more effective than any brush: the warmth helps the product melt in naturally, and the light pressure of your weakest finger prevents the tugging that can cause premature fine lines.
A small brush is also useful for blending the edges of concealer once it’s applied — press rather than sweep to avoid moving the product off the spot you’re trying to cover.
Affordable options:
- e.l.f. Concealer Brush (~$5) — precise flat brush, works well for both blemishes and under-eye
- Real Techniques Pointed Foundation Brush (~$10) — slightly larger, good for both foundation touch-ups and concealer
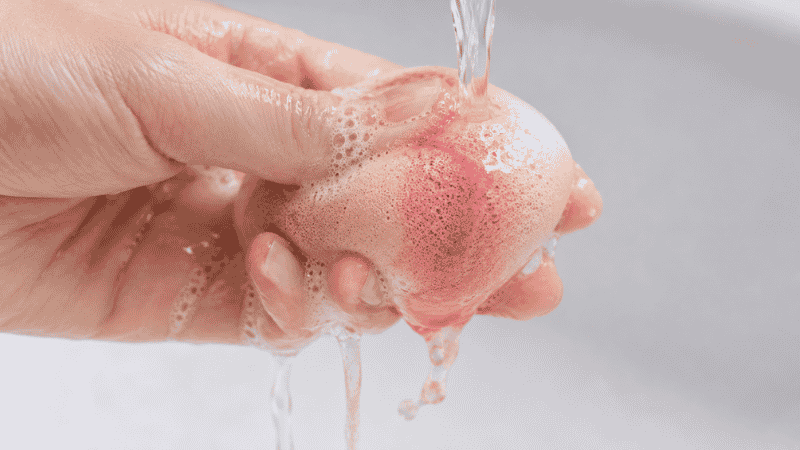
How to Clean a Beauty Sponge
Beauty sponges need more frequent cleaning than brushes — and a slightly different technique because of their porous surface.
Method: Wet the sponge under running water until it’s fully expanded. Apply a small amount of baby shampoo, gentle cleanser, or bar soap directly to the sponge. Squeeze and work the cleanser through the sponge repeatedly, squeezing it against the palm of your hand. Rinse under running water while continuing to squeeze. Repeat until the water runs clear — this takes longer than brushes because of the porous surface.
Squeeze out excess water (never wring) and let it air dry completely before storing. Store in a breathable container — not in a sealed bag, which traps moisture and creates a bacteria-friendly environment.
Replace your sponge every 3 months, or sooner if it develops an odor, tears, or the surface starts to look damaged. No cleaning routine extends the life of a sponge indefinitely.
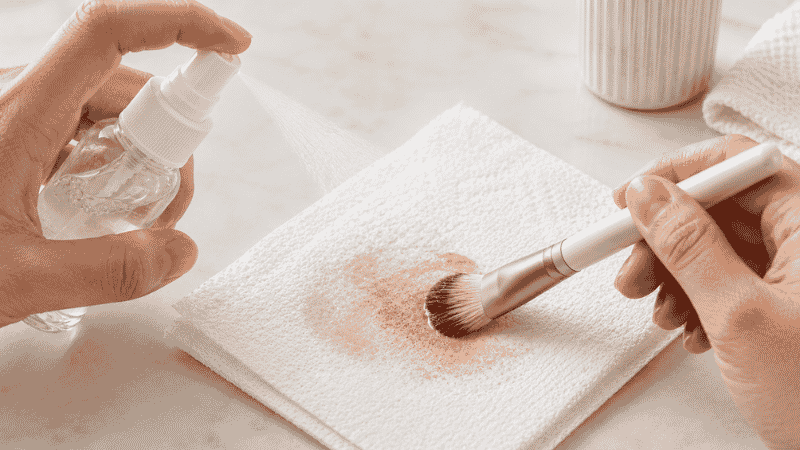
The Quick Clean: What to Do Between Full Washes
For days when you need to switch from a dark eyeshadow to a light one, or use the same brush for two different products, a quick clean is useful.
A brush cleaning spray (the e.l.f. Makeup Brush Cleaner at ~$7 is one of the most popular options) sprayed onto a paper towel and gently swirled removes most product from a brush within seconds. The brush dries almost immediately.
This isn’t a substitute for deep cleaning — it doesn’t remove all product from the base of the bristles — but it prevents color muddying and removes most surface-level product quickly.
FAQ
How often should you clean makeup brushes?
Foundation and concealer brushes should be cleaned weekly — they work with liquid products and harbor bacteria most easily. Powder brushes (blush, bronzer, eyeshadow) can be cleaned every 1-2 weeks. Beauty sponges should ideally be washed after every use, or at minimum once a week.
What can I use to clean makeup brushes at home?
Baby shampoo is the most recommended budget option — it’s gentle on bristles and effective at removing makeup residue. A gentle facial cleanser, castile soap, or dish soap (occasionally) also work. Avoid alcohol-based cleansers for deep washes as they dry out and damage bristles over time.
How do I dry makeup brushes without ruining them?
Lay them flat on a clean towel with the bristle ends hanging slightly off the edge of the surface. This allows airflow around the bristles and prevents water from running into the ferrule (the metal band holding the bristles). Never stand brushes upright to dry and never use a hair dryer.
Foundation brush or sponge — which is better?
For most beginners, a damp beauty sponge gives a more natural, forgiving result. A foundation brush provides more coverage and precision but requires more technique. Start with a sponge, add a brush once you want more control or coverage.
How do I know when to replace my makeup brushes?
Replace brushes when they shed significantly despite gentle use, when they’ve lost their original shape and can’t be reshaped, when they develop a persistent odor after washing, or when the bristles feel scratchy or stiff. With proper care, quality brushes can last years.
Clean Brushes Are One of the Easiest Skin Upgrades You Can Make
You don’t need expensive products. You don’t need special equipment. You need baby shampoo, lukewarm water, and about five minutes once a week for your foundation brush.
The payoff is immediate — cleaner color application, better blending, and fewer mystery breakouts from bacteria you’ve been pressing into your face every morning.
Keep building your routine on MyColorKiss:
- Makeup Essentials for Beginners — the complete guide to every product and tool you actually need
- How to Apply Foundation for Beginners — brush technique and the sponge method explained
- How to Apply Blush for Beginners — which brush to use and exactly where to place it
- How to Get Clear Skin — why dirty brushes might be behind your breakouts
And remember — your brushes work for you every day. Spending five minutes cleaning them once a week is the minimum they deserve.