The wiggle trick, the bottom lash technique, and the real reason your mascara ends up under your eyes — all explained.
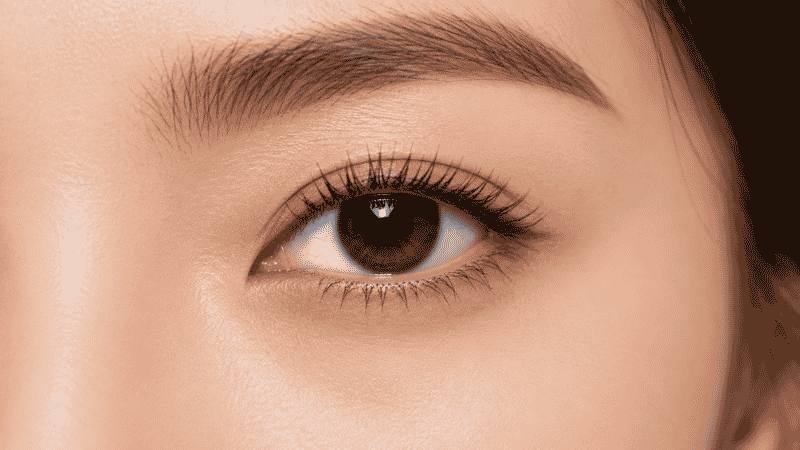
You applied your mascara. Looked great in the bathroom. Walked into natural light an hour later and discovered two things: your lashes are stuck together in little clumps, and there are black smudges under your eyes that weren’t there before. The mascara that was supposed to make you look more awake is now making you look like you’ve been crying in a parking lot.
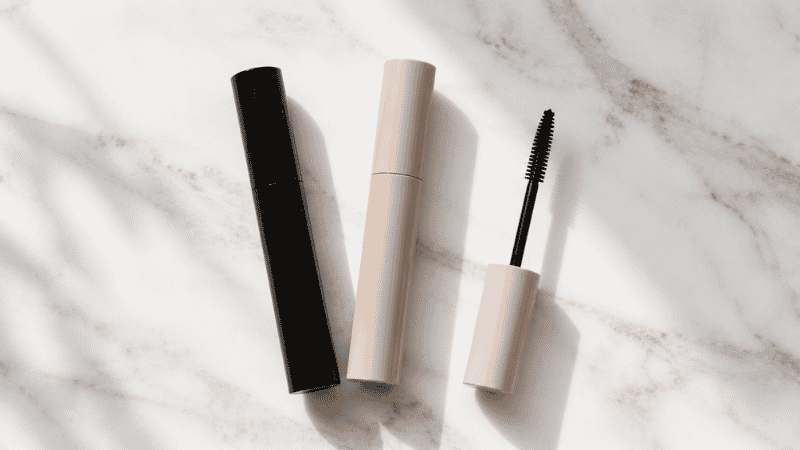
Mascara is supposed to be the easy step. One product, one wand, open eyes. But there are a handful of small techniques that separate mascara that looks incredible from mascara that ends up on your cheeks by noon — and most tutorials skip right past them.
This guide covers how to apply mascara correctly, from the wiggle trick that eliminates clumps to the exact way to handle bottom lashes without smudging. If you’ve struggled with mascara in any way, this is the guide you needed.
Key Takeaways
- The wiggle technique at the root of your lashes is the single biggest difference between clumped and separated lashes
- Bottom lashes need a vertical wand and barely any product — less than you think
- Mascara smudging under your eyes is almost always a formula + oily skin issue, not a technique issue
- Two thin coats always look better than one heavy coat — wait 30 seconds between them
- The best drugstore mascaras for beginners cost under $12 and genuinely compete with high-end options
How to Put On Mascara Step by Step
Before getting into specific problems and fixes, here’s the core technique that makes everything work.
Step 1: Start with clean, dry lashes. Oil or leftover product on your lashes prevents mascara from adhering properly and contributes to smudging. If you’re applying mascara as part of a full routine, do it after your eye makeup — eyeshadow, liner, everything — so you’re working on a clean lash surface.
Step 2: Curl your lashes first (optional but worth it). A lash curler used before mascara — never after, or you’ll break lashes — opens up your eye and makes even a single coat look much more dramatic. Hold at the base, squeeze gently for 10 seconds, release. That’s the whole technique.
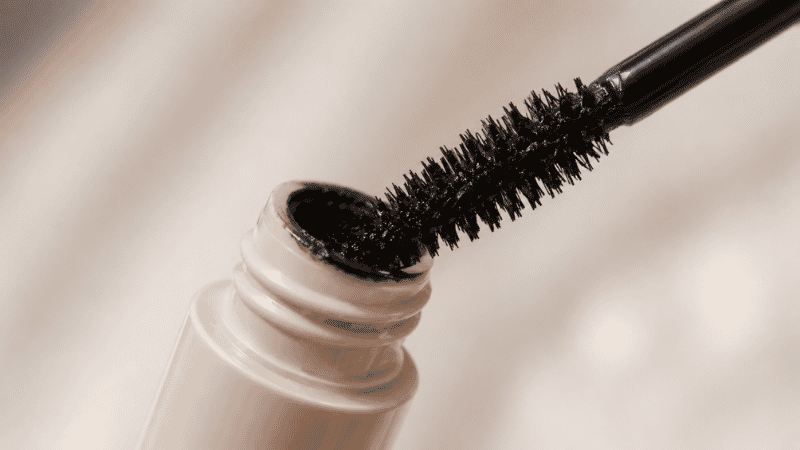
Step 3: Wipe off the excess before you start. Pull the wand out of the tube and gently wipe one side against the opening. This removes the blob of extra product that causes clumping. You want the wand lightly coated, not saturated.
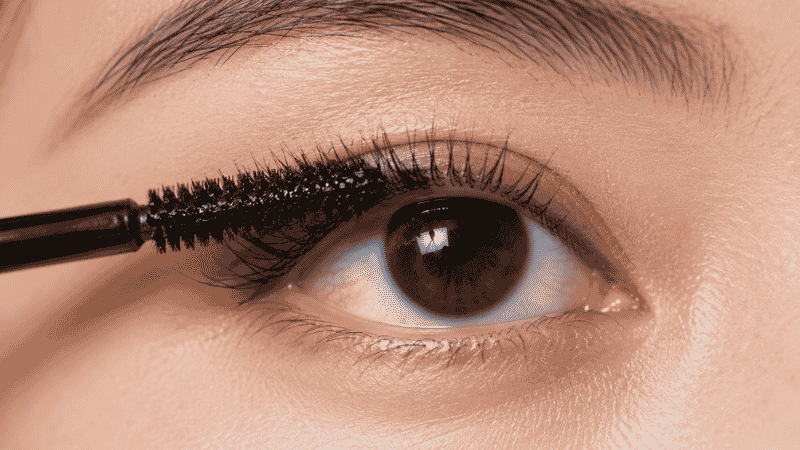
Step 4: Place the wand at the root. This is the most important positioning detail. The wand starts at the very base of your lashes, right where they grow out of your lid — not in the middle, not at the tips.
Step 5: Wiggle and sweep upward. Wiggle the wand back and forth gently as you sweep upward. This motion separates individual lashes and deposits product evenly from root to tip. Swiping straight up without wiggling is how you get clumps.
Step 6: Wait, then add a second coat. Let the first coat dry for about 30 seconds. Then repeat with a second light coat for more volume. That brief wait is what prevents the two coats from merging into a sticky, clumped mess.
How to Apply Mascara Without Clumping
Clumpy mascara has two main causes: too much product on the wand, or applying the second coat before the first one is dry. Both are completely fixable.
The wand wipe. Always wipe excess product off the wand before applying. Most mascaras deposit way more formula than you need on the first pull, and that excess is what creates clumps.
The wiggle motion. A straight swipe up piles product onto lashes without separating them. The side-to-side wiggle at the root grooms each lash individually as you sweep upward, which is exactly what you see professional makeup artists doing.
The 30-second wait. Two coats on top of each other when the first is still wet = clumps, every time. The wait is boring but non-negotiable.
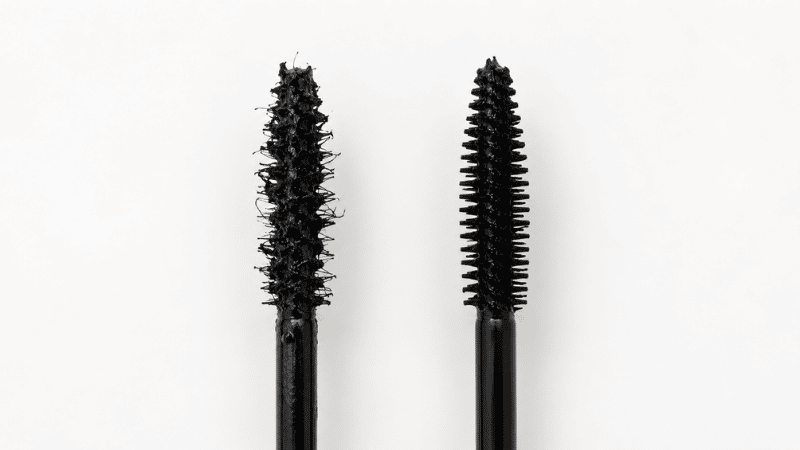
The wand shape matters. Fluffy bristle wands add volume; narrow, rubber wands separate and define. If your mascara keeps clumping despite the right technique, try a wand with more separated bristles. The L’Oréal Telescopic Mascara (~$11) has an incredibly precise narrow brush that makes clumping nearly impossible.
Editor’s note: Old mascara clumps more than new mascara. Mascaras should be replaced every three months — the formula dries out, the bristles stiffen, and the result gets worse over time. If your mascara is six months old and clumping no matter what, it might just be time for a new one.
How to Apply Mascara to Bottom Lashes
Bottom lashes are where most beginners go wrong — and where most mascara ends up on skin instead of lashes. The technique is genuinely different from upper lashes.
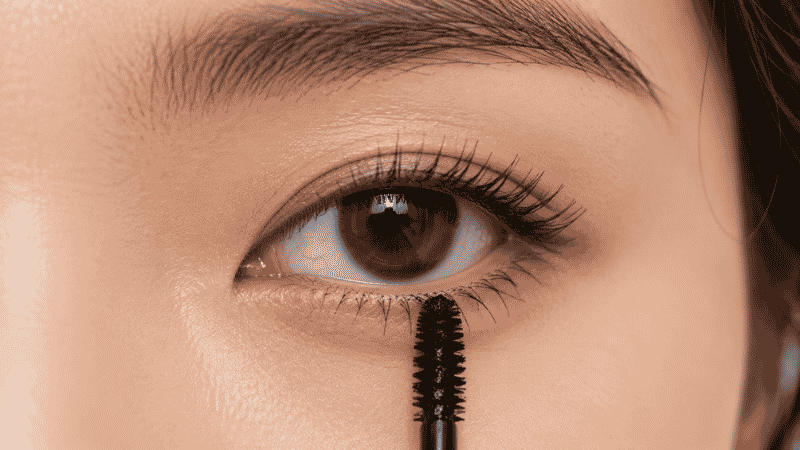
Hold the wand vertically, not horizontally. A horizontal wand is great for upper lashes but too wide for lower lashes — it hits your skin before it hits your lashes. Turn the wand 90 degrees so it’s pointing straight up, and use just the very tip to stroke individual lower lashes.
Use almost no product. Before moving to lower lashes, wipe the wand one more time against the tube opening. Lower lashes are tiny, and they need barely any formula. A wand that’s loaded for upper lashes will immediately smudge on your lower lash line.
Work from the outer corner inward. Start at the outer corner of your lower lash line — where the lashes are longer — and work toward the inner corner. Stop before you reach the very inner corner, where the lashes are so short that mascara there usually just ends up on your waterline.
Let it dry completely before blinking. Look up for about 15 seconds after applying to lower lashes. Looking down immediately — or blinking — transfers wet mascara straight onto the skin below your eye.
How to Stop Mascara from Smudging Under Your Eyes
Mascara under your eyes by midday is one of the most common mascara complaints, and it almost never has to do with how you applied it. It’s almost always about oil.
The skin around your eyes produces oil throughout the day. That oil breaks down regular mascara formula and causes it to migrate downward. The more oily your eyelids and under-eye area, the faster this happens.
The most effective fix: switch to a tubing or waterproof mascara. Tubing mascaras form tiny tubes around each lash rather than coating them with pigment — they’re removed with warm water and don’t budge from oil. The Essence Lash Princess False Lash Effect Mascara (~$5) and the Maybelline Sky High Waterproof (~$10) are both excellent drugstore options for oily skin.
If you don’t want to switch formulas: Apply a light dusting of translucent setting powder under your eyes before mascara. The powder creates a barrier that absorbs oil and prevents mascara from transferring as easily. The Coty Airspun Loose Face Powder (~$8) works beautifully for this.
Check your eye primer. If you’re using a cream eyeshadow or a primer that isn’t fully set before applying mascara, that moisture transfers to your lashes and contributes to smudging. Let eye products dry completely before mascara.
Why Does My Mascara Flake?

Flaking — those little black specks that appear under your eyes hours after application — is a formula problem more than a technique problem.
Old mascara flakes more. The formula dries out as you pump air into the tube (stop pumping the wand in and out — it accelerates drying and introduces bacteria). Mascara older than three months is the most common culprit.
Some formulas just flake. Fiber mascaras — the ones that add tiny fibers to lashes for dramatic length — are notorious for this. If you’re seeing flakes and using a fiber formula, that’s likely the cause. Switch to a regular formula.
Too many coats without drying time between them creates a thick layer that’s more prone to cracking and flaking as it dries. Two coats maximum, with a proper wait between them.
Best drugstore mascaras that rarely flake:
- Maybelline Lash Sensational Sky High (~$10) — flexible polymer formula, minimal flaking even after 8+ hours
- e.l.f. Lash ‘N Roll (~$10) — buildable, clean formula, no fiber ingredients
- NYX Worth the Hype Mascara (~$10) — glossy formula that flexes rather than cracks
How to Layer Mascara for More Volume
If you want bigger, more dramatic lashes without false lashes, layering is the technique — but there’s a right and wrong way to do it.
The right way: One coat, wait 30 seconds, second coat. That’s the whole method. The wait time is what makes the difference between buildable volume and a sticky clump.
For maximum volume, try a two-mascara technique: apply a volumizing mascara first (like the L’Oréal Voluminous Original (~$9) for thickness), let it set, then apply a lengthening mascara on top (like the L’Oréal Telescopic (~$11) for separation and length). The volume comes from the first coat; the second coat defines and separates. This is genuinely a professional technique and it costs under $25 total.
How many coats should you apply? Two coats is the sweet spot for everyday wear. Three is the maximum before you start getting into diminishing returns — more product without more definition, just more weight. Past three coats, mascara adds bulk without beauty.
How to Apply Waterproof Mascara
Waterproof mascara is great for longevity and smudge prevention, but it comes with one significant downside: it’s harder to remove, and rubbing to remove it damages lashes over time.
Application is the same as regular mascara — wiggle at the root, sweep up, two coats. The formula is slightly drier and sets faster, so work quickly and don’t go back over areas that have already dried.
Removal requires an oil-based remover. Regular micellar water doesn’t fully break down waterproof formula. Use a dedicated eye makeup remover or a gentle cleansing oil, hold it against your lashes for 20–30 seconds to let it dissolve the mascara, then gently wipe downward. No rubbing.
If removing waterproof mascara is causing lash loss or irritation, consider switching to a tubing formula instead — it gives similar smudge resistance but removes with just warm water.
When You Only Have 2 Minutes
Mascara is genuinely the one makeup product you can do in under two minutes and still look completely different. If that’s all you have:
One coat on upper lashes only, wiggle at the root, sweep up. Skip bottom lashes, skip curling, skip everything else. One coat of mascara on your upper lashes opens your eyes more than almost any other single product you own. Everything else is bonus.

FAQ
How do I apply mascara without clumping?
Wipe excess product off the wand before applying, use a side-to-side wiggle motion at the root of your lashes as you sweep upward, and wait at least 30 seconds between coats. The wiggle separates lashes; the wait prevents wet coats from merging into clumps.
How do I stop mascara from smudging under my eyes?
Switch to a waterproof or tubing formula — these resist oil breakdown throughout the day. If you prefer regular mascara, dust translucent setting powder under your eyes before applying to create a barrier against oil transfer.
How do I apply mascara to bottom lashes without it going everywhere?
Hold the wand vertically and use only the very tip. Use barely any product on the wand — wipe it again before moving to lower lashes. Work from the outer corner inward, and look up for 15 seconds after applying to let it dry before blinking.
Why does my mascara flake by the end of the day?
Usually because the mascara is old (replace every 3 months), the formula contains fibers, or you applied too many coats without letting them dry between applications. Switch to a non-fiber formula and replace your mascara more frequently.
How many coats of mascara should I apply?
Two coats is the ideal for everyday wear — enough for visible volume and length without becoming heavy or clumpy. Three is the maximum. More than that adds weight without improving the look.
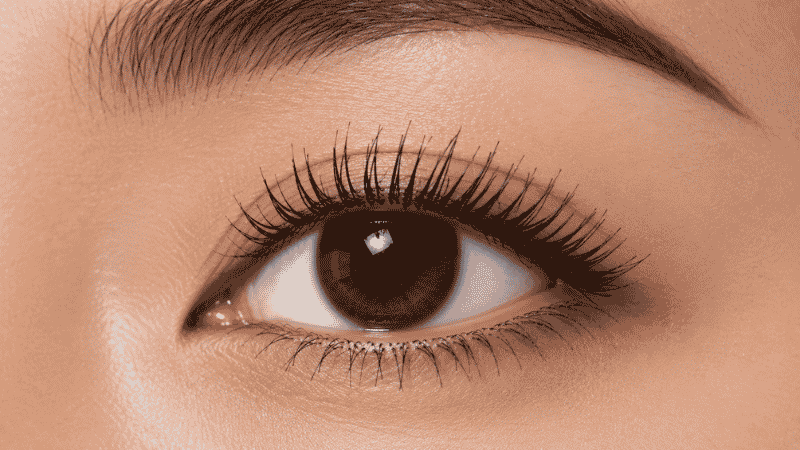
Mascara Is the One Product That Changes Everything in 90 Seconds
That’s not an exaggeration. One coat of mascara on clean, separated lashes — done with the wiggle technique — opens your eyes in a way that’s visible from across the room. It’s the fastest return on effort in your entire makeup bag.
Get the wiggle technique down. Stop pumping your wand. Wait between coats. And if smudging is your nemesis, try switching to waterproof or tubing formula before giving up on mascara entirely. It’s a formula problem, not a you problem.
Keep building your eye makeup routine on MyColorKiss:
- Makeup Steps in Order: The Only Guide Beginners Actually Need — where mascara fits in the full routine
- How to Apply Blush for Beginners — once your eyes are done, here’s what comes next
- Makeup Tutorial for Beginners: Your Easy Step-by-Step Guide — the full routine from scratch
And remember — even the makeup artists you follow on TikTok have had a mascara-under-the-eyes day. It happens. The technique gets easier every time.