Where to put it, what shade to use, and why yours might be looking muddy — all explained simply.
You’ve watched the tutorials. You’ve applied what looked like a reasonable amount of product. And somehow your face looks less like “sculpted cheekbones” and more like you drew brown stripes on your face and forgot to blend them. Or it looked fine in your bathroom but in daylight you looked like you’d been crying under a mudslide.
Contouring has this reputation for being one of the harder makeup skills to get right — and that reputation is mostly deserved, because almost every beginner tutorial skips the two things that matter most: shade selection and blending. Get those two wrong and no amount of careful placement will save you.
This guide covers how to contour your face correctly, from scratch, without spending $50 on a contour palette. The right shade for your skin tone, where exactly to place it, cream vs. powder explained simply, how to contour a round face, and — most importantly — why your contour keeps looking muddy and how to fix it.
Key Takeaways
- Your contour shade should be 1-2 shades darker than your foundation, always matte — never shimmer or bronzy
- Cream contour is more forgiving for beginners; powder contour is easier to control and lasts longer on oily skin
- The most common contouring mistake is using too much product — start with less than you think you need
- Contour goes after foundation and concealer, before blush and highlight
- The entire process takes under 3 minutes once you know where to place the product
Is Contour the Same as Bronzer?
This is the first question to clear up because using the wrong product is the most common reason beginner contouring looks orange instead of sculpted.
Contour and bronzer are not the same thing.
Bronzer adds warmth and a sun-kissed glow to your face. It’s often slightly shimmery or has warm orange-brown undertones — it’s designed to mimic a tan. You apply it where the sun would naturally hit: forehead, nose bridge, cheeks, chin.
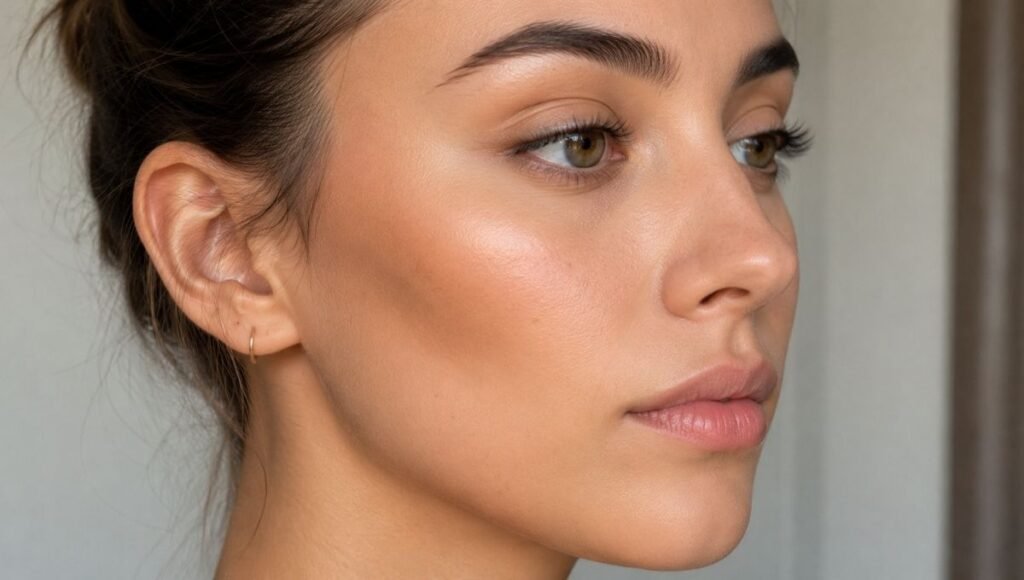
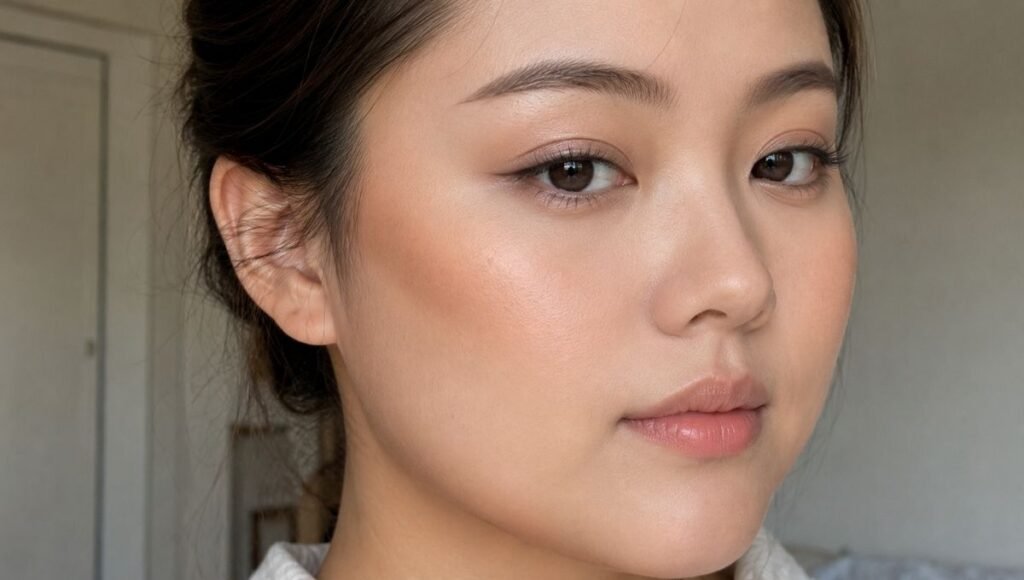
Contour creates shadow. It’s designed to mimic the natural shadows your face casts when light hits it at an angle. A true contour product should be cool-toned (with slightly grey or taupe undertones), completely matte, and applied to areas you want to visually recede: the hollows of your cheeks, the sides of your forehead, under your jawline.
Using bronzer as a contour is the reason so many beginners end up with an orange stripe across their cheekbone. Bronzer adds warmth; contour adds depth. They’re different effects from different products.
Editor’s note: The “3” technique you see in every tutorial — drawing a number 3 on each side of your face from forehead to cheek to jaw — is a useful starting point, but it works much better with a true cool-toned contour than with bronzer. If you’ve been using bronzer to contour and wondering why it looks muddy, this is probably why.
What Color Should Contour Be?
1-2 shades darker than your foundation, cool-toned, matte.
That’s the rule. But let’s unpack what “cool-toned” means in practice, because this trips up a lot of beginners.
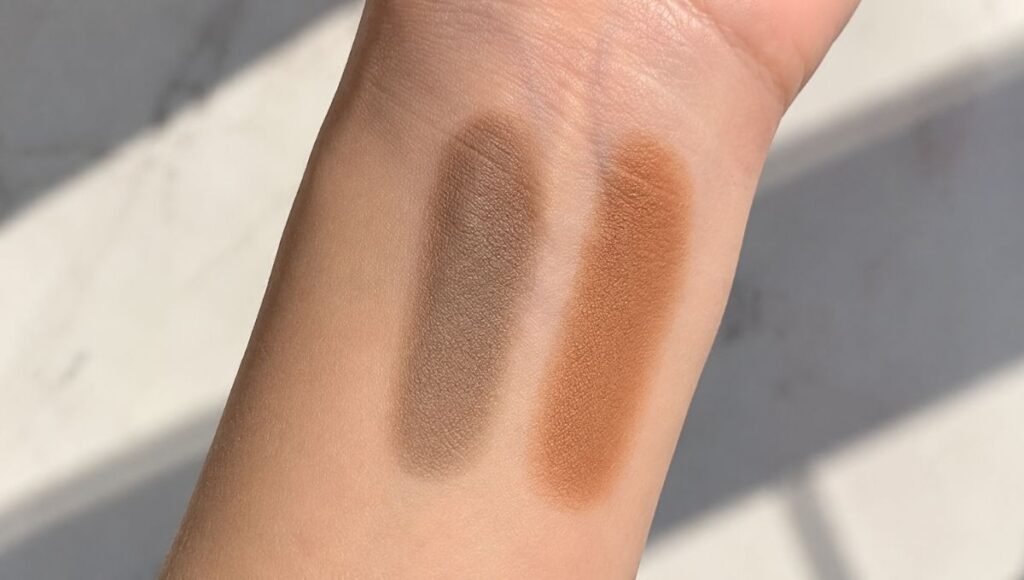
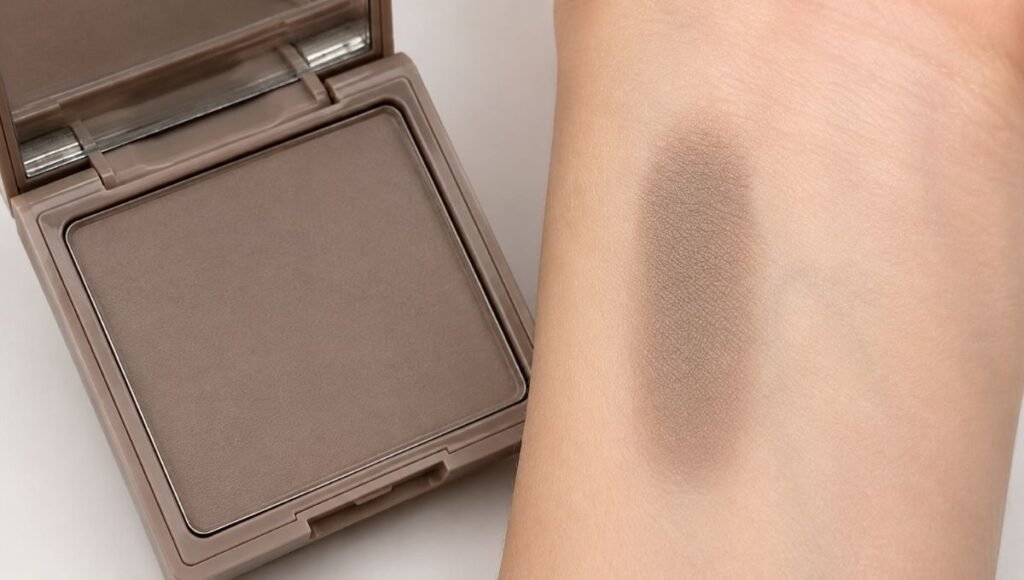
Cool-toned in a contour means the product has grey, taupe, or ashy undertones — not orange, not golden, not warm brown. When you look at the product in the pan, it should look slightly grey or neutral rather than warm. This mimics the natural shadows that form on a face, which are actually cool in tone because they’re areas where less warm light is hitting.
By skin tone:
Fair to light skin: Look for soft taupe or light cool-brown contour shades. Anything too dark will look harsh. The NYX Wonder Stick Contour and Highlight (~$12) has a great light contour shade on one end.
Medium skin: A medium cool-brown works well. The e.l.f. Contour Palette (~$14) has buildable shades that suit medium skin tones without going too dark or too warm.
Tan to deep skin: Richer cool-brown or deep taupe shades. A product that looks too subtle on fair skin will give a natural shadow effect on deeper skin. The Wet n Wild Contour Palette (~$5) has surprisingly good deep shades for the price.
The test: Swatch your candidate contour shade next to your foundation. If the contour looks like a warm, orange-adjacent brown, it will look muddy. If it looks like a cool, slightly grey-brown, it will look like a natural shadow.
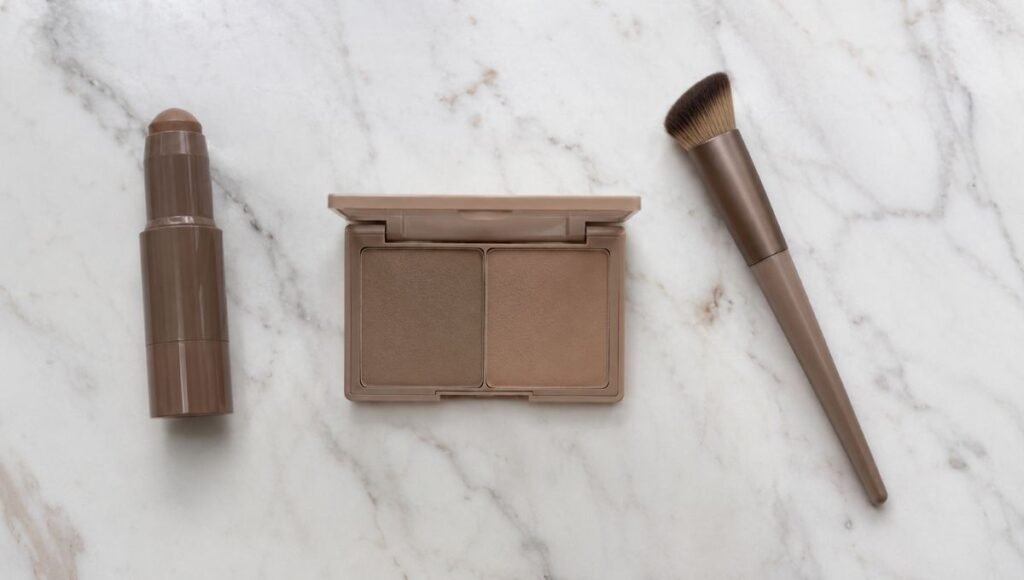
Cream Contour vs Powder Contour: Which Is Better for Beginners?
The honest answer: cream for most beginners, powder for oily skin.
Here’s the breakdown:
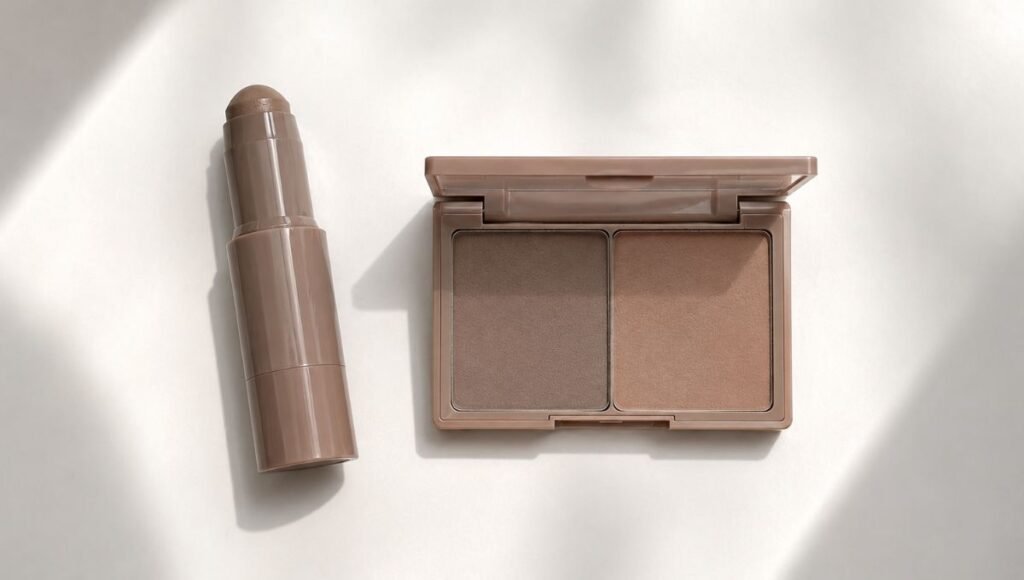
Cream Contour
Cream contour (stick, compact, or cream formula) blends into your skin and gives a soft, natural, skin-like shadow. It looks more natural and is more forgiving of placement errors — if you put it in slightly the wrong spot, it blends out easily with a sponge or finger.
Apply before setting powder. Cream goes on after foundation and concealer, while your base is still slightly tacky. Use a damp sponge to blend, tapping and pressing rather than swiping.
Best for: Dry skin, combination skin, beginners wanting a natural everyday look, anyone who prefers minimal-product makeup.
Drugstore cream contour picks:
- NYX Wonder Stick Contour and Highlight (~$12) — twist-up stick, easy to control, good for beginners
- e.l.f. Putty Contour Duo (~$12) — buildable cream formula, blends easily, good shade options
- Wet n Wild MegaGlo Contouring Palette (~$5) — cream-to-powder formula, surprisingly blendable
Powder Contour
Powder contour is applied after setting powder, using an angled brush. It’s easier to control the amount (dust off excess before applying), easier to build gradually, and significantly better for oily skin because it doesn’t slide.
The trade-off: it’s slightly harder to blend seamlessly, and on dry skin it can look powdery or patchy if not applied carefully.
Apply after setting powder. Tap off excess product from the brush, then apply with light sweeping motions. Build gradually — it’s much easier to add more than to take it away.
Best for: Oily skin, anyone who wants more precise sculpting, longer wear.
Drugstore powder contour picks:
- Physicians Formula Butter Bronzer (~$14) — technically a bronzer but the matte version works beautifully as a soft contour for fair to medium skin
- e.l.f. Contour Palette (~$14) — powder contour and highlight in one compact, great for beginners
- NYX Professional Makeup Highlight and Contour Pro Palette (~$17) — multiple shades for different skin tones
Where to Contour Your Face: The Simple Guide
Forget the complex diagrams. Here are the three spots where contour makes the most difference for most faces:
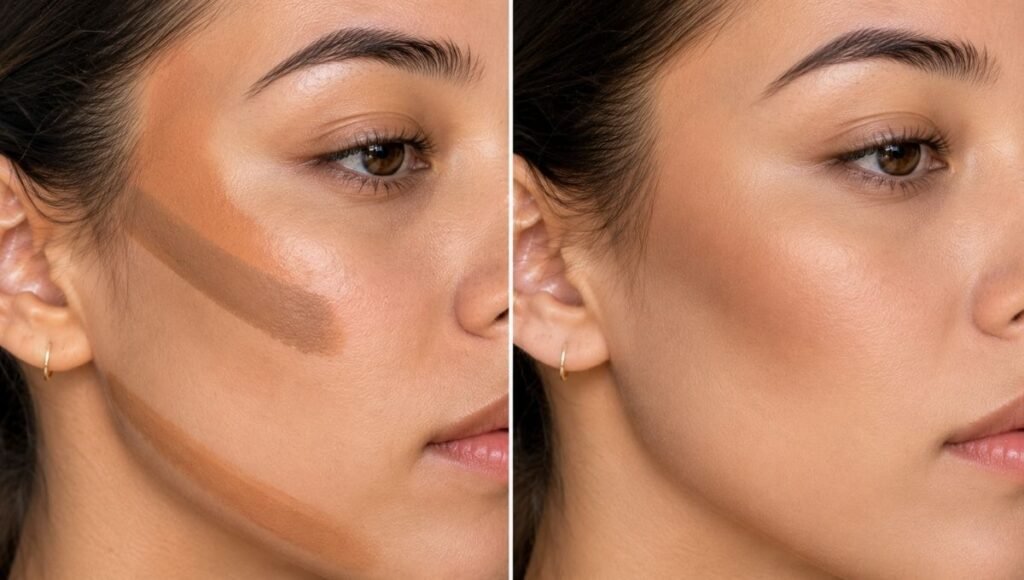
1. The hollows of your cheeks Suck in your cheeks slightly to find the hollow — the indentation just below your cheekbone. Apply contour here, starting from your ear and blending inward and upward toward your cheekbone. Stop about two finger-widths from the corner of your mouth — going too close to the center of your face is what creates the gaunt, sunken look.
2. The sides of your forehead (temples) Apply a small amount of contour at your temples — the curved area at the sides of your forehead, near your hairline. Blend it upward into your hairline. This creates the illusion of a narrower forehead and gives your face more dimension.
3. Under your jawline Apply contour just under the jawbone, blending downward toward your neck. This defines the jaw and creates separation between your face and neck. Don’t blend it up onto your face — it goes under and down, not over your chin.
Optional — nose contouring: Apply two thin lines of contour down the sides of your nose and blend carefully. This is an advanced technique that’s easy to overdo. Skip it until you’re comfortable with the rest.
Contour Before or After Foundation?
The answer depends on your formula:
Cream contour: after foundation, before setting powder. Cream products blend best into a foundation base that’s still slightly tacky. If you’ve already set with powder, cream contour will sit on top rather than blend in.
Powder contour: after foundation AND after setting powder. Powder on powder — same rule as with blush. Your setting powder creates a smooth surface for powder contour to adhere to and blend evenly.
The full order with contour included: Skincare → Foundation → Concealer → Cream contour (if using) → Setting powder → Powder contour (if using) → Blush → Highlight → Setting spray
How to Contour a Round Face
Round faces have full cheeks and a similar width and length — the goal of contouring is to create more definition and the illusion of length.
What works: Apply contour higher than you might on an oval face — directly under the cheekbone rather than in the hollow. Blend diagonally upward toward your temple rather than horizontally across your face. This diagonal direction elongates rather than widens.
At the temples, apply contour slightly further into the forehead than you would on other face shapes — this visually narrows the upper portion of your face.
Under the jawline, apply contour all the way around the jaw (not just underneath) to define and visually slim the lower face.
What to avoid: Applying blush straight across the apple of the cheek in a horizontal direction — this widens the face. Sweep blush upward toward the temple instead, in the same diagonal direction as your contour.
The key for round faces: everything goes diagonal and upward. Products applied horizontally emphasize width; diagonal application creates length.
How to Use a Contour Stick
Contour sticks are the most beginner-friendly format because the twist-up applicator lets you apply product directly to the face without a brush.
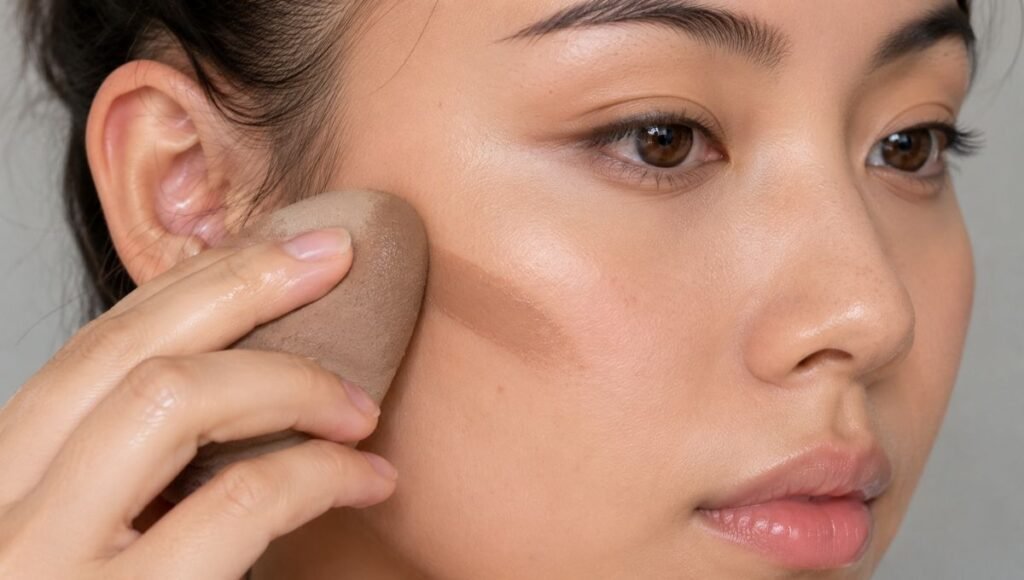
Step 1: Draw a thin line with the contour stick directly on the hollow of your cheek, starting from your ear. Don’t draw a thick stripe — a single thin line is enough to start.
Step 2: Blend immediately with a damp beauty sponge using small tapping motions. Work from the center of the line outward toward the edges, not the other way around.
Step 3: Check in natural light. If you can still see a line, blend more. If it’s disappeared entirely, add another thin line and blend again.
The key with contour sticks: blend before the product sets. Most cream formulas have a short window — about 30-60 seconds — before they start to dry down. Work quickly and don’t try to add too much product at once.
Why Does Your Contour Look Muddy?
This is the question nobody answers directly in beginner tutorials. Here are the actual reasons:
Wrong shade undertone. If your contour is warm-toned (orange or golden brown) instead of cool-toned (taupe or grey-brown), it reads as dirt rather than shadow. Switch to a cooler-toned product.
Too much product. Contouring requires less product than almost any other makeup step. A little goes a very long way — especially with cream formulas. When in doubt, use half of what you think you need.
Not blending enough. There should be no visible edges where your contour begins and ends. The product should fade seamlessly into your foundation on all sides. If you can see a line, keep blending.
Blending in the wrong direction. Blend contour upward and outward (toward your hairline), never downward. Downward blending drags the product into the wrong place and creates a muddy, drooping effect.
Applying over a powdery base with cream product. If you’ve heavily set your face with powder and then try to apply cream contour, it won’t blend — it’ll sit on top and look patchy. Use powder contour over a powdery base, or apply cream contour before you set.
The 5-Minute Version for Everyday Wear
Full contouring doesn’t need to be a production. Here’s the minimal version that still makes a visible difference:
- Take a contour stick and draw one thin line under each cheekbone
- Blend with a damp sponge for 30 seconds
- Add a tiny amount at each temple if you want more definition
- Done
That’s it. Two minutes, one product, noticeable cheekbone definition. The elaborate 12-step contour tutorials are for editorial looks — not Tuesday mornings.
What to Do If Your Contour Still Isn’t Working
It looks too dark: You used too much. Use a damp sponge to press (not wipe) over the contour to sheer it out. Or apply a small amount of foundation over the top and blend again.
It’s completely disappeared: Your shade is too light, or you over-blended. Try a slightly deeper shade, or apply two thin layers instead of one.
It looks patchy: Your skin is dry and the product is catching on texture. Apply a more hydrating primer first, or switch to a powder contour which sits more evenly on textured skin.
The edges look harsh: You need to blend further out. Take a clean, fluffy brush with no product and sweep it over the edges of your contour in circular motions to soften them.
FAQ
Where exactly do you put contour on your face?
The three main areas: the hollows of your cheeks (the indentation just below your cheekbone), your temples (the sides of your forehead near your hairline), and under your jawline. These are the spots where natural shadows form on a face, so contouring them looks the most realistic.
What color should contour be?
One to two shades darker than your foundation, cool-toned (slightly grey or taupe, not warm or orange), and completely matte. A contour with warm undertones will look muddy on most skin tones. Check that the product looks more grey-brown than orange-brown before buying.
Does contour go before or after foundation?
Contour goes after foundation. Cream contour goes after foundation but before setting powder. Powder contour goes after both foundation and setting powder.
Is contour the same as bronzer?
No. Bronzer adds warmth and a sun-kissed glow — it’s warm-toned and sometimes has shimmer. Contour creates shadow and depth — it’s cool-toned and always matte. Using bronzer to contour is the most common reason beginner contouring looks orange rather than sculpted.
What’s the easiest contour product for beginners?
A contour stick is the most beginner-friendly — you apply directly to the face and blend with a sponge. The NYX Wonder Stick Contour (~$12) and the e.l.f. Putty Contour Duo (~$12) are both widely recommended drugstore options that are easy to blend and control.
Contouring Is a Skill, Not a Trick
The tutorials make it look effortless because the people doing them have done it hundreds of times. Your first few attempts will probably look slightly off. That’s not a failure — it’s practice.
Start with a contour stick, use less product than you think you need, and blend upward. Get comfortable with those three things and everything else will follow.
Keep building your routine on MyColorKiss:
- How to Apply Blush for Beginners — blush goes on after contour, and the placement works together with it
- Makeup Steps in Order — where contouring fits in your full routine
- Natural Makeup Look Tutorial — a soft contour is part of the clean girl aesthetic
- How to Apply Foundation for Beginners — contouring works best on a well-matched foundation base
And remember — the goal isn’t to look like a completely different person. It’s to look like you, with slightly more definition. A little contour goes a very long way.