
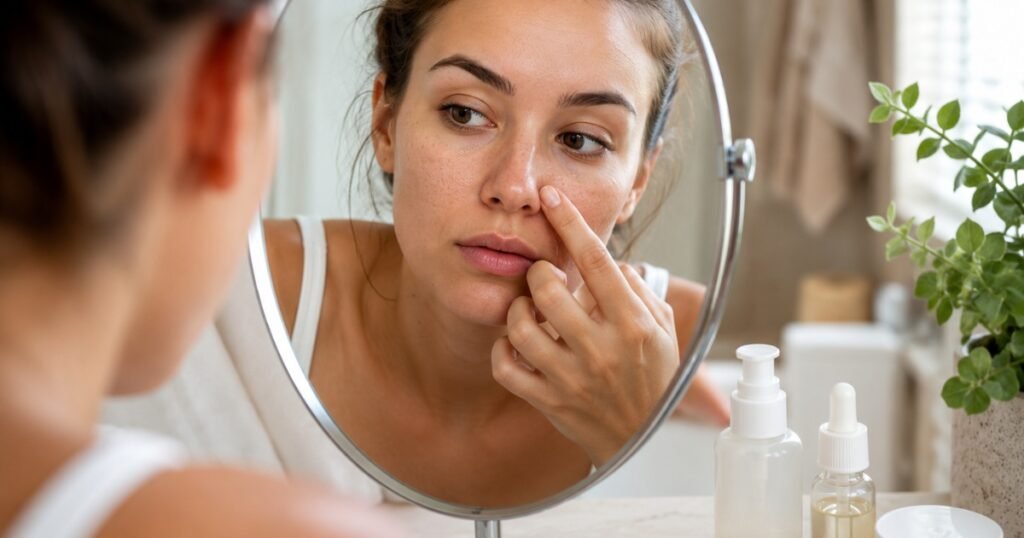
Those tiny dark dots on your nose never seem to go away. You wash your face, try another scrub, maybe even use a pore strip, yet they’re still there—sometimes looking even more noticeable right before you put on makeup.
The truth is, most of what you’re seeing isn’t dirt, and it doesn’t mean your skin is dirty. In most cases, it’s oil and dead skin trapped inside your pores that darken after being exposed to air. The real problem is that many popular “quick fixes”—scrubbing harder, squeezing, or overusing pore strips—often leave your skin more irritated without solving the issue.
Looking for how to get rid of blackheads on nose without wasting money or following a complicated skincare routine? You’re in the right place. We’ll cover what actually works, what to avoid, and a simple beginner-friendly routine that fits into everyday life. Whether you want fewer blackheads over time or a smoother-looking nose before makeup, these tips will help you get there.
Quick Answer: What Actually Helps
Remember this: blackheads respond to consistency, not intensity. A gentle cleanser, a salicylic acid (BHA) product used a few times a week, and an occasional clay mask will do more for your nose than any single “miracle” tool.
Here’s what a realistic approach looks like:
- Figure out first whether you’re dealing with actual blackheads or something called sebaceous filaments (more on that below — it changes your whole approach).
- Stick to a gentle cleanser and add BHA (salicylic acid) into your routine two to three nights a week.
- Use a clay mask occasionally to help absorb excess oil, not daily.
- If you wear makeup or sunscreen, add a cleansing oil step to your evening routine.
- Skip the daily nose strips and skip the finger-squeezing — both tend to backfire.
- Think of this as ongoing maintenance, not a one-time deep clean.
A simple starting routine:
Morning: gentle cleanser → lightweight moisturizer → sunscreen
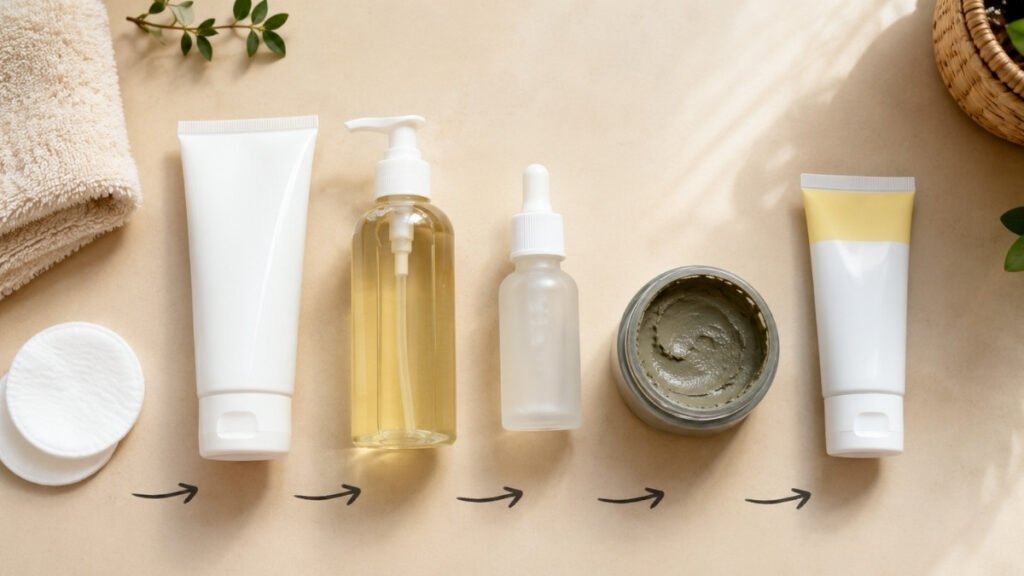
Night: cleansing oil (if you wore makeup or sunscreen) → gentle cleanser → BHA (2–3 nights a week) → moisturizer
Keep it simple. A few well-chosen products used consistently will do far more than a shelf full of products you rarely reach for.
Why Do Blackheads Form on Your Nose?
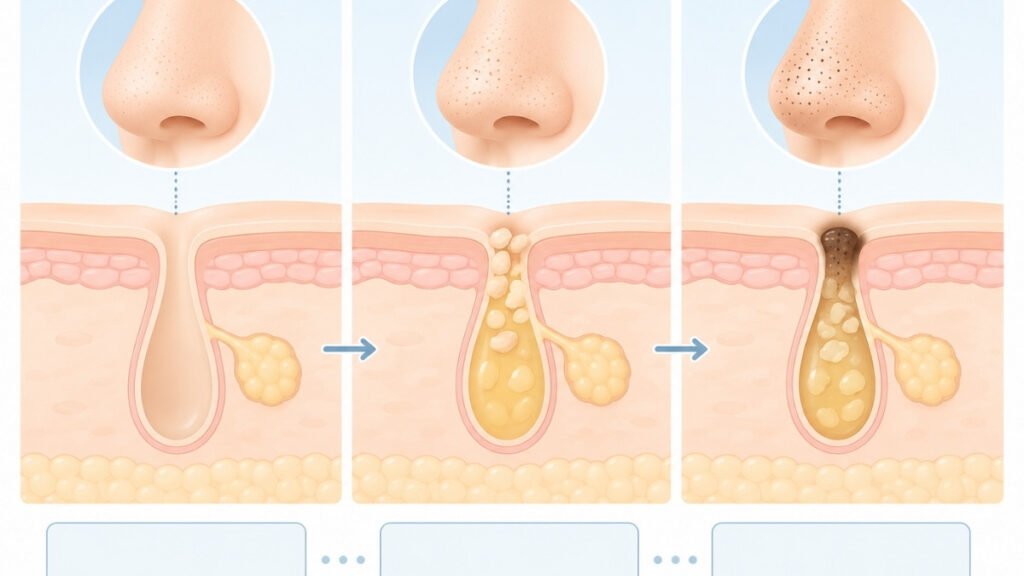
Blackheads happen when a mix of oil and dead skin cells gets stuck inside a pore, and the top of that plug reacts with air and turns dark. It’s an oxidation process, not a hygiene issue — similar to how a sliced apple turns brown once it’s exposed to oxygen. That dark tip you see is oxidized oil, not built-up dirt.
Why the Nose Gets Blackheads More Easily
Your nose has more oil glands packed into a smaller area than almost anywhere else on your face, and those pores also tend to be a bit larger. More oil production plus bigger pore openings is basically a recipe for blackheads to show up here first, even if the rest of your skin looks fairly clear.
Blackheads Aren’t Dirt
It’s one of the most common misunderstandings: blackheads are not caused by dirty skin. It’s surprisingly common for people to wash their face three or even four times a day hoping to “clean out” their pores, only to notice their blackheads staying just as visible — or their skin getting irritated and drier instead. Over-washing doesn’t remove what’s already inside the pore. It just strips your skin’s natural barrier, which can actually make oil production worse.
If you want to understand the fundamentals of a solid routine before layering on treatments, it helps to start with Beginner Skincare Basics so you’re not accidentally undoing your progress with the wrong habits.
Blackheads or Sebaceous Filaments? Here’s How to Tell the Difference
I used to think every tiny dark dot on my nose was a blackhead. It turns out that isn’t true. A lot of what people try to remove are actually sebaceous filaments—something everyone has. Knowing which one you’re dealing with can save you from wasting money on products that were never going to fix the problem in the first place.
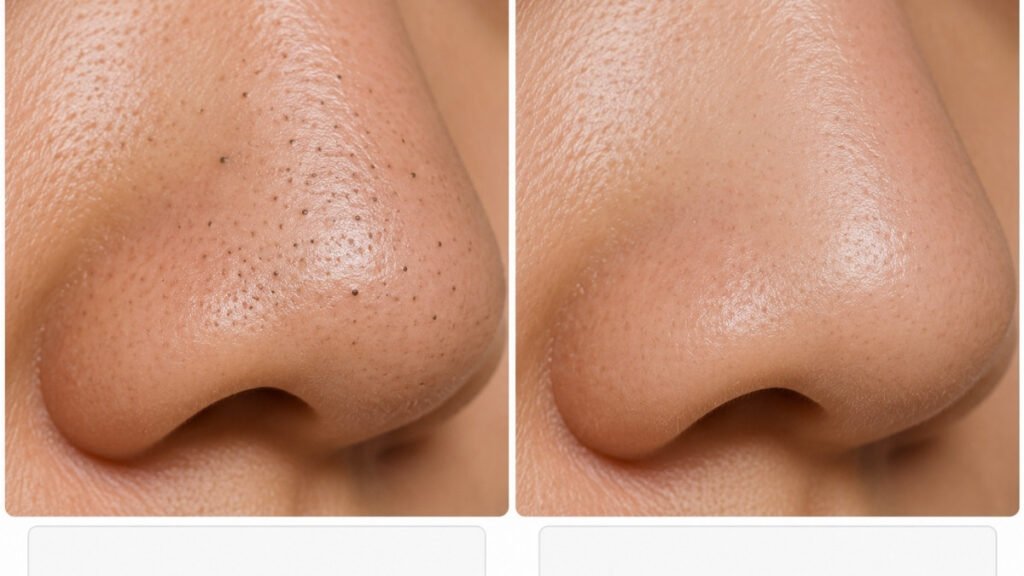
Sebaceous filaments are naturally occurring linings inside your pores that help channel oil to the surface of your skin. Everyone has them. They’re not clogged, they’re not a skin problem, and they will never fully disappear — because they’re a normal part of your pore structure, not a flaw.
| Blackheads | Sebaceous Filaments | |
|---|---|---|
| Color | Dark brown to black | Light gray to yellowish |
| Texture | Slightly raised, can feel bumpy | Flat, usually not raised |
| Size | Larger, more scattered | Small, tightly clustered, especially on the nose |
| Can they disappear permanently? | Yes, with treatment and prevention | No — they naturally refill shortly after extraction |
| Best treatment | BHA (salicylic acid), gentle exfoliation, clay masks | Regular gentle exfoliation to keep them less visible |
| Should beginners worry? | Worth addressing with a routine | Not really — they’re normal skin anatomy |
It’s surprisingly common for people to spend six months religiously using acids and treatments, convinced they’re “fighting” their blackheads, when they’re actually just seeing normal sebaceous filaments that were never going away in the first place. Once you know the difference, it’s a lot easier to set realistic expectations and stop feeling like your routine is failing you.
If you want to dig deeper into other habits that quietly work against your skin, Beginner Skincare Mistakes covers a few more that are easy to fall into without realizing it.
A Simple Routine That Actually Helps Reduce Nose Blackheads
For a long time, I thought getting rid of blackheads meant buying more products. In reality, simplifying my routine made a much bigger difference. A gentle cleanser, a few targeted products, and using them consistently will get you much further than trying every new trend you see online.
Step 1: Clean Gently
Start and end your day with a gentle, low-foaming cleanser. Avoid anything that leaves your skin feeling tight or squeaky afterward — that tightness is a sign your barrier is being stripped, not a sign your face is “really clean.”
Step 2: Use Cleansing Oil Correctly
If you wear sunscreen or makeup, a cleansing oil should come before your regular cleanser at night. This step helps dissolve the oil-based buildup (including sunscreen, which plain face wash often can’t fully remove on its own) so your BHA can actually reach your pores instead of sitting on top of leftover residue.
Step 3: Add Salicylic Acid
BHA (salicylic acid) is oil-soluble, which means it can travel into the pore itself and help break down the oil and debris that leads to blackheads. Start with two to three nights a week rather than daily — your skin needs time to adjust, and more frequent use doesn’t speed up results, it just increases your chances of irritation.
Step 4: Use a Clay Mask Weekly
A clay mask once a week can help absorb excess surface oil and gently support the exfoliation your BHA is already doing. This isn’t a step you need daily — clay masks can be drying if overused.
Step 5: Moisturize and Protect
Every acid-based routine needs a moisturizer to follow it, and daily sunscreen matters more than most beginners expect. Skipping sunscreen while using exfoliating acids is one of the fastest ways to end up with sensitive, reactive skin.
Beginner Weekly Routine Checklist:
- [ ] Cleanse gently, morning and night
- [ ] Use cleansing oil at night if wearing makeup or SPF
- [ ] Apply BHA 2–3 nights a week (not daily, especially when starting out)
- [ ] Use a clay mask once a week
- [ ] Moisturize every single day, even on acid nights
- [ ] Apply sunscreen every morning without skipping
One common mistake beginners make is trying to layer everything at once during week one — cleansing oil, BHA, and a clay mask, all in the same few days. Give your skin two to three weeks on a slower, simpler version of this routine before adding more.
For a deeper breakdown of using acids safely, the Beginner Salicylic Acid Guide is a good next stop, and if you’re shopping on a budget, the Budget Cleansing Oil Guide can help you pick a solid option without overspending.
How to Use Cleansing Oil Without Making Blackheads Worse
Oil cleansing has a bit of a reputation problem, mostly because people assume “using oil on oily skin” sounds counterintuitive. In reality, oil dissolves oil far more effectively than a foaming cleanser does — but the technique matters more than most people realize.
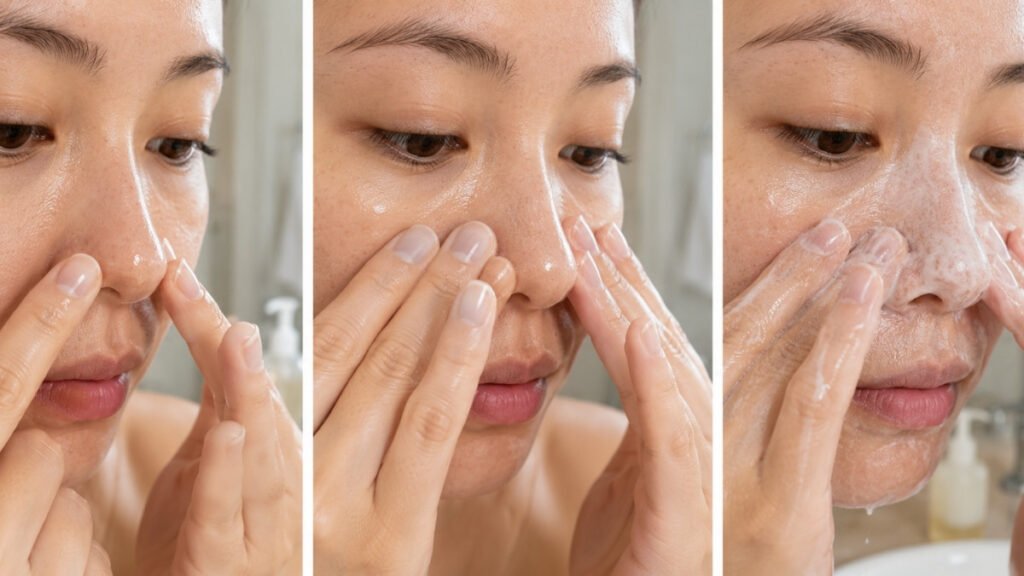
Oil Cleansing Checklist:
- [ ] Start with completely dry hands and a dry face (water breaks the emulsification process too early)
- [ ] Apply the oil and massage gently for 60–90 seconds — this doesn’t need to be longer to work
- [ ] Watch for the oil to turn slightly milky; that’s the emulsification kicking in
- [ ] Add a small splash of water and continue massaging briefly until it fully emulsifies
- [ ] Rinse thoroughly, then follow with your regular gentle cleanser (this is your double cleanse)
- [ ] Avoid massaging for several minutes straight thinking longer equals cleaner
A practical tip worth knowing: emulsification not being done properly is one of the most common reasons people report a sudden batch of clogged pores or small bumps after starting oil cleansing. If the oil isn’t fully emulsified before rinsing, some of it can sit on the skin instead of washing away cleanly. This isn’t a sign that oil cleansing “doesn’t work for you” — it usually just means the technique needs a small adjustment.
Oil cleansing isn’t mandatory if you don’t wear sunscreen or makeup regularly. But for anyone doing a daily base with SPF, it’s genuinely one of the most useful additions you can make. If you’re not sure where to start, Best Budget Cleansing Oils rounds up a few affordable, beginner-friendly picks.
What Helped My Blackheads—and What Was Just a Waste of Time
I tried more than one “instant fix” before realizing most of them only made my nose look better for a few hours. The products that actually improved my blackheads weren’t the most satisfying to use—they were simply the ones I kept using consistently. Here’s what’s worth your time, and what you can probably skip.
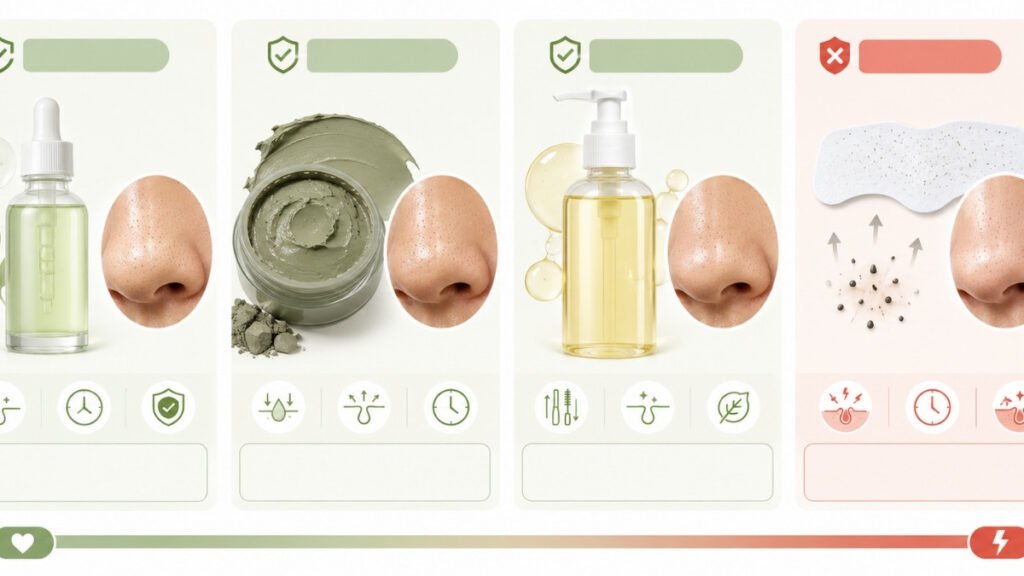
| Method | Effectiveness | Irritation Risk | How Long Results Last | Beginner-Friendly? | Cost |
|---|---|---|---|---|---|
| BHA (Salicylic Acid) | High, with consistent use | Low to moderate | Ongoing, with regular use | Yes | $ |
| Clay Mask | Moderate | Low | Temporary, weekly upkeep | Yes | $ |
| Cleansing Oil | Moderate (prevention-focused) | Low | Ongoing, with regular use | Yes | $ |
| Nose Strips | Low | Moderate | A few hours to a day | Use sparingly | $ |
| Pore Vacuums | Low | Moderate to high | A few hours to a day | Not recommended for beginners | $$ |
| Manual Extraction Tools | Low, risky if done incorrectly | High | Temporary | Not recommended for beginners | $ |
| Retinoids | High, long-term | Moderate | Ongoing, with regular use | Better for intermediate users | $$ |
| Professional Facials/Extractions | High, short-term | Low (when done by a professional) | Weeks | Occasional treat, not a routine | $$$ |
A lot of people genuinely believe nose strips are their most effective option, largely because you can visually see what came out afterward. In reality, that satisfying “reveal” is often just temporarily pulling the surface plug out — the pore itself is still there, still open, and typically refills within a day or two. It’s less of a fix and more of a very short-term reset.
Methods that create lasting improvement over time — BHA, consistent gentle exfoliation, proper oil cleansing — tend to be the least dramatic in the moment, which is exactly why they get overlooked in favor of more visually satisfying options.
For more on building a gentle, sustainable exfoliation habit, Beginner Exfoliation Guide is a solid next read.
Common Mistakes That Make Blackheads Worse
A lot of frustration with blackheads doesn’t actually come from the blackheads themselves — it comes from the habits people pick up trying to get rid of them faster.
Stop Doing These:
- [ ] Using nose strips every day (they’re meant for occasional use, not a daily habit)
- [ ] Squeezing or picking with fingers or tools (this can push debris deeper and cause micro-tears)
- [ ] Using BHA or scrubs daily, especially in the first few weeks
- [ ] Layering multiple acids at once (like BHA and retinoids together) without easing in
- [ ] Rinsing off cleansing oil before it’s fully emulsified
- [ ] Skipping moisturizer because your skin feels oily
- [ ] Skipping sunscreen, especially while using exfoliating acids
| Instead of This | Try This |
|---|---|
| Squeezing blackheads with fingers | Let BHA gradually soften and clear pores over time |
| Using BHA every night | Start with 2–3 nights a week |
| Skipping moisturizer to “dry out” oil | Moisturize daily — dehydrated skin often produces more oil |
| Daily nose strips | Occasional use, alongside a proper routine |
It’s fairly common for people to develop redness or sensitivity around their nose and assume a product isn’t working for their skin, when the real issue is that it’s simply being used too often. Cutting back frequency — not switching products entirely — is often the fix.
If you want a broader look at habits that quietly undo good routines, Common Skincare Mistakes is worth a read.
How to Prevent Blackheads From Coming Back
Blackheads aren’t something you clear once and never think about again — they’re more like something you manage on an ongoing basis, similar to how hair keeps growing back after a haircut. Oil production doesn’t stop, so pores will continue to need regular, gentle upkeep.
Weekly Maintenance Schedule
| Day | Task |
|---|---|
| Monday | Gentle cleanse, moisturize |
| Tuesday | BHA night |
| Wednesday | Gentle cleanse, moisturize |
| Thursday | BHA night |
| Friday | Clay mask (10–15 minutes) |
| Saturday | Gentle cleanse, moisturize |
| Sunday | Rest day — cleanser and moisturizer only |
This schedule is a starting template, not a strict rule — some people do better with BHA only twice a week, and that’s completely fine. The goal is consistency you can actually maintain, not a perfect routine you abandon after two weeks.
What Results Can Beginners Expect?
Most people notice visibly smaller, less obvious pores and fewer new blackheads within four to six weeks of consistent use. Full elimination isn’t realistic, and any product claiming otherwise isn’t being upfront with you. What is realistic is a nose that looks noticeably smoother and less congested than where you started — and stays that way as long as you keep up the routine.
Over time, many people realize that the goal isn’t a permanently blackhead-free nose — it’s a low-maintenance routine that keeps things under control without much daily effort. That mindset shift tends to make skincare feel a lot less frustrating.
For your everyday base routine outside of blackhead-specific care, Daily Beginner Skincare Routine is a helpful companion guide.
How to Get a Smooth Nose Before Makeup
Even after weeks of sticking to a good routine, my nose still has the occasional “bad skin day.” That’s completely normal. The trick isn’t piling on more makeup—it’s prepping your skin the right way before foundation goes on.
5-Minute Emergency Prep
- Cleanse gently to remove any surface oil (don’t skip this even if you’re in a rush).
- Apply a lightweight, oil-free moisturizer and let it fully absorb for a minute or two.
- Apply a pore-blurring primer specifically to your nose, using a thin layer.
- Use a small amount of foundation or concealer only where needed — heavier layers tend to sink into pores and make them more obvious, not less.
- Set lightly with a translucent powder, pressed gently rather than swiped.
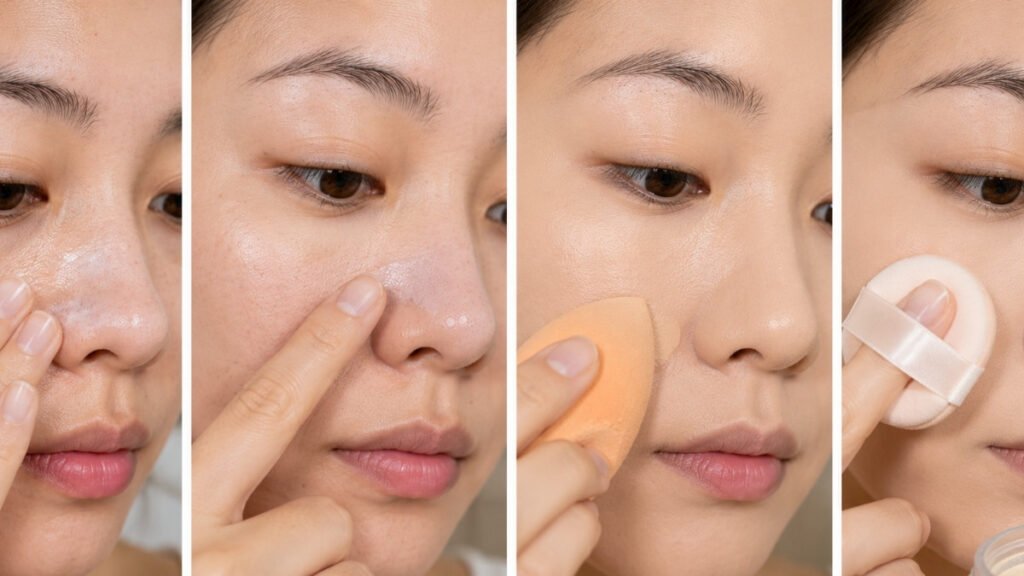
Best Primer Texture for Textured Noses
Silicone-based, blurring primers tend to work best for pore-prone noses because they sit on the surface and visually soften texture rather than sinking into it. Watery or dewy primers can look beautiful on smooth areas of the face but sometimes emphasize texture around the nose, so it’s worth using a slightly different primer just for that area if your foundation keeps looking uneven there.
Makeup Prep Checklist:
- [ ] Cleanse and let skin fully dry before primer
- [ ] Use a blurring, pore-focused primer on the nose specifically
- [ ] Apply foundation in a thin layer, building up only where needed
- [ ] Press powder on instead of swiping it
- [ ] Blot with a tissue midday instead of adding more powder on top of oil
A practical tip a lot of people learn the hard way before an event or interview: piling on more powder throughout the day to control shine actually makes cakey texture worse, not better. Blotting with a tissue first, then applying a very light powder touch-up, keeps things looking fresh instead of heavy.
For more on keeping your base looking smooth all day, How to Stop Foundation From Looking Cakey and Best Budget Primers are great next reads.
Affordable Products Beginners Can Start With
It’s easy to think better skincare means spending more money. I learned pretty quickly that a simple routine with a few reliable products worked far better than buying everything at once.
| Category | What to Look For | Beginner Notes |
|---|---|---|
| Cleansing Oil | Simple, fragrance-free formulas | Great if you wear SPF or makeup daily |
| BHA (Salicylic Acid) | 0.5–2% concentration, no added fragrance | Start low, use 2–3x weekly |
| Clay Mask | Kaolin or bentonite-based | Weekly use only, avoid daily masking |
| Gentle Cleanser | Low-foaming, pH-balanced | Should never leave skin feeling tight |
| Moisturizer | Lightweight, oil-free or gel-based for oily skin | Never skip, even on acid nights |
| Sunscreen | Broad-spectrum SPF 30+ | Non-negotiable with any acid routine |
| Primer | Silicone-based, blurring formula | Focus on nose area for texture control |
A practical tip for anyone shopping on a tight budget: you genuinely don’t need to buy every category brand-new all at once. Start with a gentle cleanser and BHA — those two alone will do more for your blackheads than an entire shelf of extras. Add in a cleansing oil, clay mask, or primer once you’ve settled into the basics.
Many beginners notice that the products making the biggest difference aren’t the expensive ones — they’re the ones they actually remember to use every single day. Price tags don’t determine results nearly as much as consistency does.
If you’re building a full routine from scratch, Budget Skincare Under $100 is a helpful starting point for putting all of this together without overspending.
Frequently Asked Questions
How can I tell if the dark spots on my nose are actual blackheads or sebaceous filaments?
Look closely at color and pattern: true blackheads tend to be darker, more scattered, and slightly raised, while sebaceous filaments are lighter gray, flatter, and appear in tight, evenly spaced clusters. If you gently stretch your skin and the dots seem uniform and repetitive across your whole nose, you’re likely looking mostly at sebaceous filaments — which are normal and not something that needs aggressive treatment.
What is the most effective and beginner-friendly skincare ingredient for clearing nose blackheads?
Salicylic acid (BHA) is generally considered the most effective and accessible option for beginners, since it’s oil-soluble and can work inside the pore itself. Start with a low concentration two to three times a week rather than daily, and give it several weeks before judging results.
How do I correctly use cleansing oil to melt away blackheads without causing acne break outs?
Apply the oil to a completely dry face, massage for about a minute, then add a small amount of water and continue massaging until it turns milky before rinsing. Skipping the emulsification step and rinsing too early is the most common reason cleansing oil ends up causing breakouts instead of preventing them.
Why do blackheads and sebaceous filaments keep coming back so quickly after cleaning?
Oil production doesn’t stop, so pores refill naturally within a day or two of any extraction method, and sebaceous filaments in particular are a permanent part of your pore structure that will always be there. This is why ongoing maintenance works far better than chasing a single “clean” moment.
Are pore strips or nose extractor tools safe to use for blackhead removal?
They’re not inherently dangerous, but they’re also not a long-term solution and can cause irritation or micro-tears if used too often or too aggressively. If you enjoy using them occasionally, that’s fine — just don’t rely on them as your main blackhead strategy, and avoid daily use.
How often should I exfoliate with BHA or salicylic acid to treat blackheads without damaging skin barrier?
Two to three times a week is a solid starting point for most beginners, with room to adjust based on how your skin responds. Daily use, especially early on, is one of the fastest ways to compromise your skin barrier and end up with more sensitivity, not fewer blackheads.
What is an affordable skincare routine for beginners to keep nose pores clean on a budget?
A gentle cleanser and a BHA product are the two essentials worth prioritizing first, since they cover the core of blackhead prevention without requiring a big upfront investment. From there, a clay mask and cleansing oil (if you wear makeup or SPF) can be added gradually as your budget allows.
How can I prep my nose before applying foundation to prevent cakey makeup and visible pores?
Cleanse, moisturize, and let products fully absorb before applying a blurring primer specifically to your nose, then use foundation in thin layers rather than one heavy application. Setting with a light press of powder — instead of swiping — helps keep texture from becoming more visible throughout the day.
🏠 Behind This Guide
Blackheads aren’t a sign that your skin is dirty—they’re simply part of how oily skin works. That’s why this guide focuses on simple habits beginners can actually stick with instead of expensive tools or quick fixes.
Inside, you’ll learn three essentials:
- 🧼 Build a Simple Routine — Cleanse gently, use BHA correctly, and stay consistent.
- 🔍 Know What You’re Treating — Learn the difference between blackheads and sebaceous filaments.
- 💄 Keep Results Looking Better — Prevent new blackheads and create a smoother base for makeup.
Because clearer skin isn’t about finding one miracle product.
It’s about building a routine you’ll actually keep using.
💕 Keep Learning with MyColorKiss
Good skincare isn’t about doing more—it’s about doing the right things consistently. These beginner-friendly guides will help you build a simple routine, avoid common mistakes, and feel more confident every step of the way.
- Skincare Routine for Beginners — Learn how to build a simple daily routine that cleanses, moisturizes, and protects your skin.
- How to Remove Makeup Properly — Discover the right way to remove makeup without irritating your skin or clogging your pores.
- Night Skincare Routine — Build an easy nighttime routine that helps your skin recover while you sleep.
- Oily Skin Care Routine — Find practical tips and beginner-friendly products to keep oily skin balanced and comfortable.
- How to Get Clear Skin — Explore everyday habits that can help you achieve healthier, clearer-looking skin over time.
❤️ A Final Note
Beautiful makeup and healthy-looking skin don’t come from buying more products—they come from building simple habits that work for you.
At MyColorKiss, we’re here to make beauty feel less overwhelming. With beginner-friendly tutorials, practical beauty tips, and affordable product recommendations, we help you avoid common mistakes and build confidence one step at a time.
Because beauty should be simple, affordable, and made for real life.